Once you’ve formatted your Excel, Google Sheets, or CSV files according to our previous guide. Let’s walk you through the steps of adding your data set on the Ajelix BI platform.
1. Go to Ajelix Data
2. Click on Upload Dataset

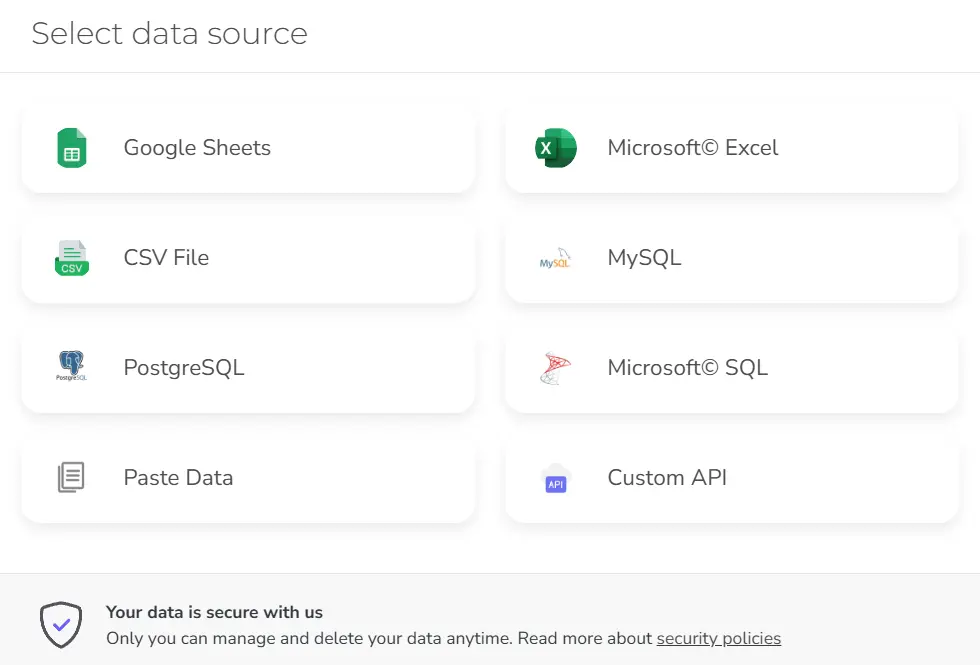
3. Choose the correct data file type from the available list
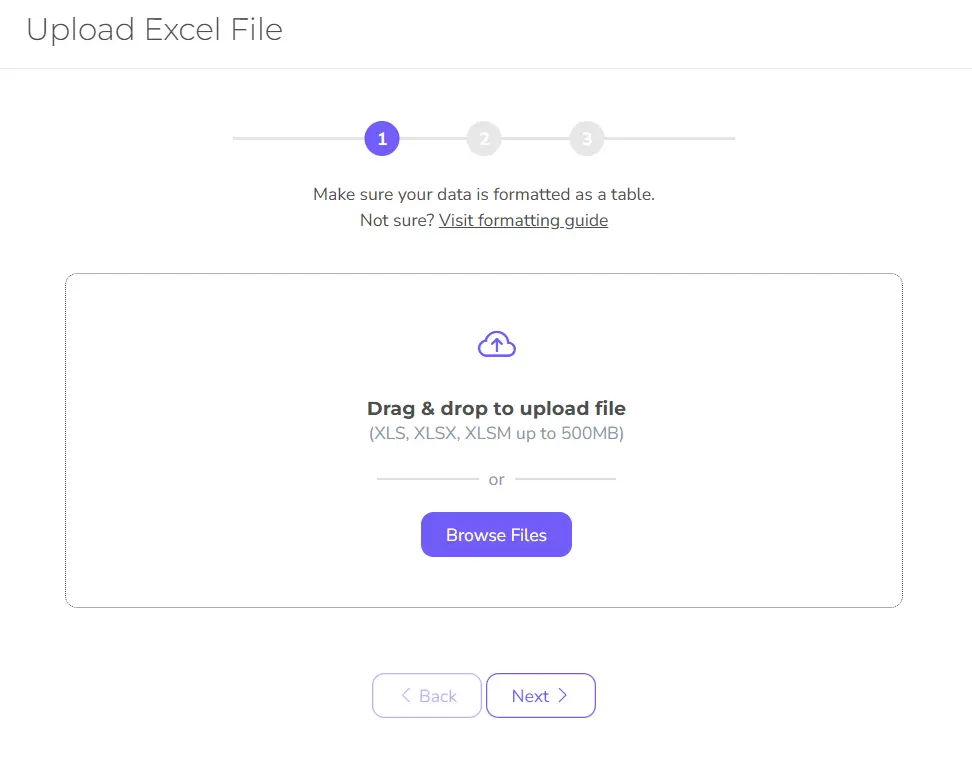
4. Depending on which data source you want to add, there will be a different setup. You can find more detailed guides on how to upload an Excel file or add a Google Sheets file.
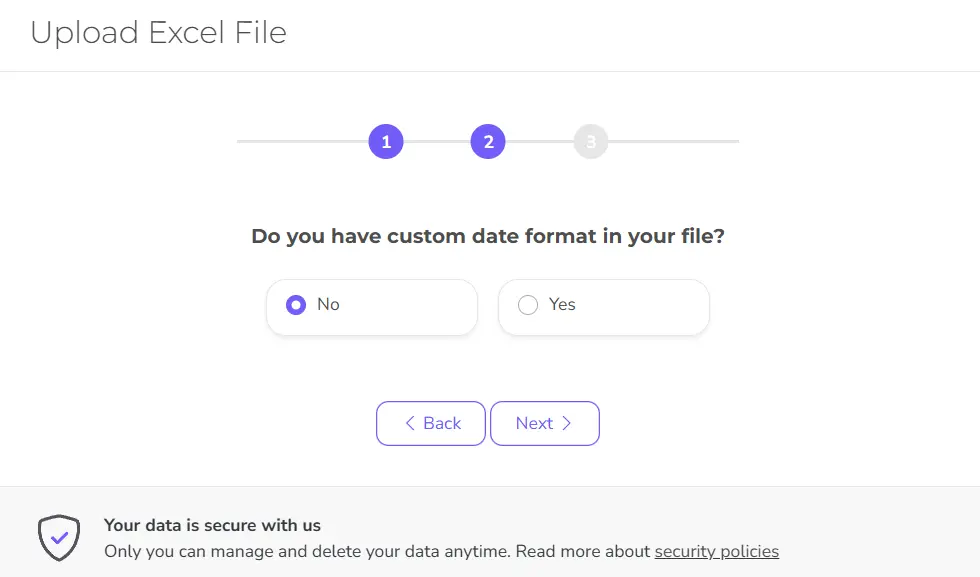
5. Once you have entered the first step details the next step for files will be information about custom date settings.
- If you don’t have any date columns in your data source, then you can simply skip this step
- If you have dates in your data, then please enter the customer date type you’re using. If your date formatting is standard, like yy/mm/yyyy or mm/dd/yyyy, then, again, you can skip this step.
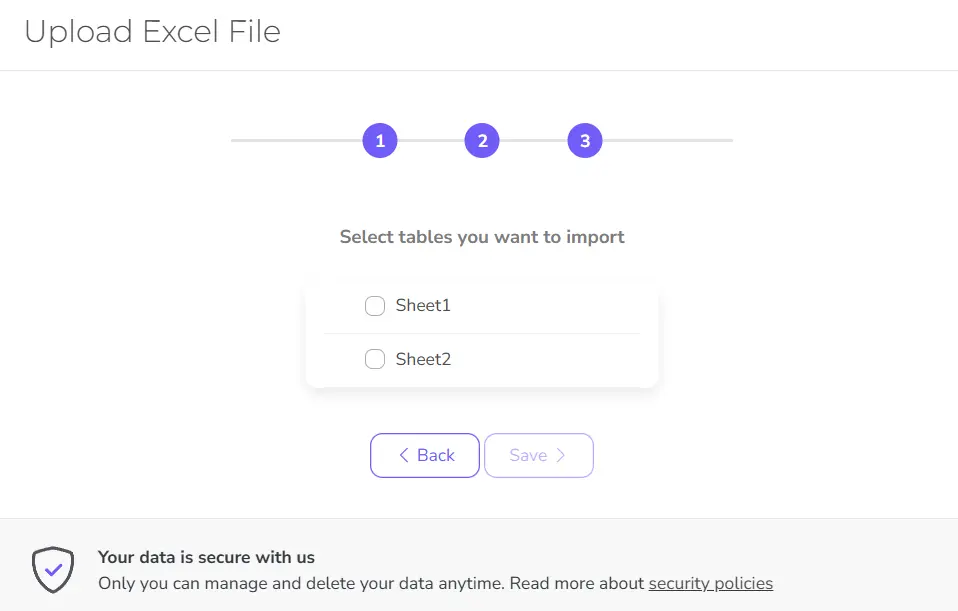
6. The next step will ask you to select the sheets or tables you want to import. Here, you can select all the data you want to see on your dashboard.
Please note that with a free plan, you can add only one sheet to upgrade to an unlimited sheet selection for Business.
7. In the final step, you can select:
- Data preparation if you want to calculate KPIs; clean your data with SQL functions
- Add dashboard to start building charts
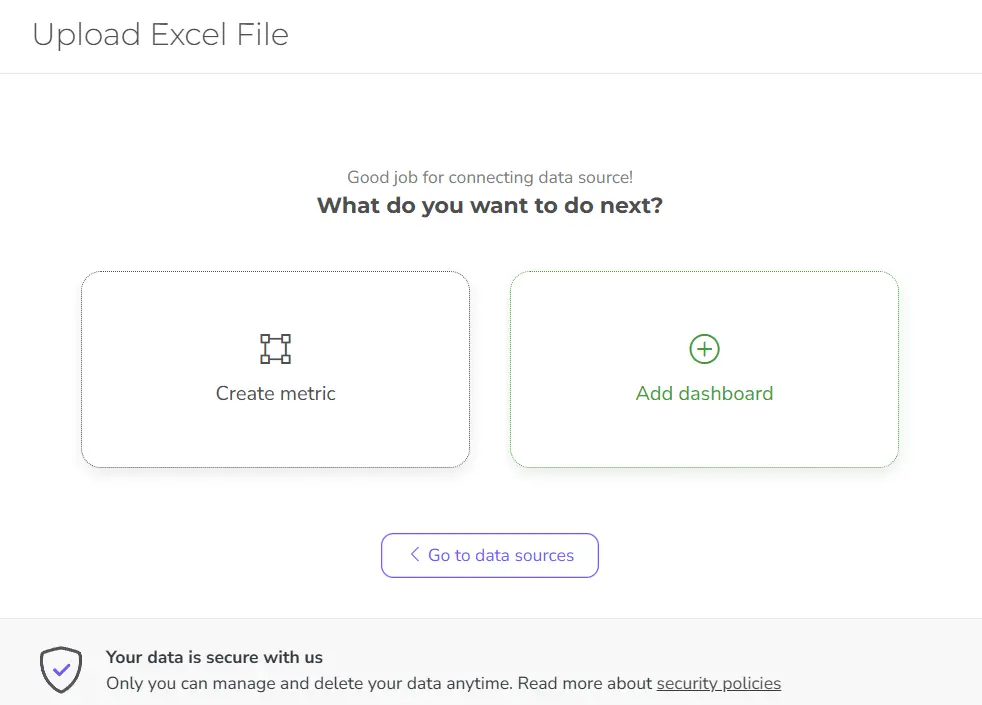
Either way, you can go to data preparation anytime, and you can even add metrics and dimensions on the dashboard editor view.
Now you can move on to the next step: to build your first report on Ajelix BI.
Didn’t find the answer to your question? Contact us via: support@ajelix.com
