This guide covers the Ajelix chat interface, its features, and how to navigate and use each component for optimal productivity.
The Chat Window
The main chat interface is your central workspace for interacting with Ajelix AI. Messages appear in a conversational thread with clear visual distinction between user inputs and AI responses.
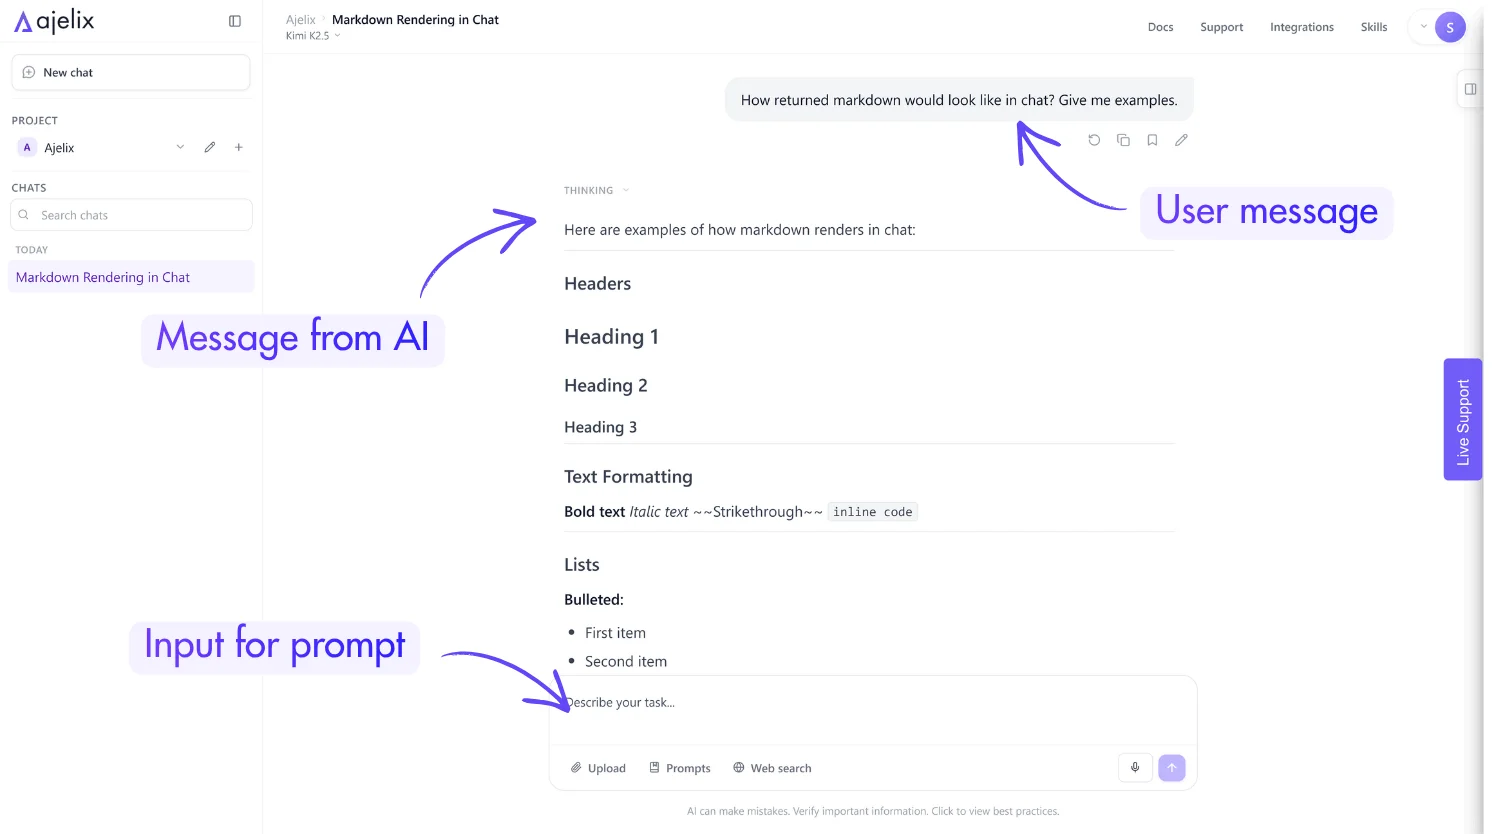
Note: When requesting formatted output, specify the format upfront (e.g., “Show this as a table” or “Format as a bulleted list”) for best results.
Ajelix: AI Agent Mode
Ajelix operates in Agent Mode – a powerful AI assistant designed for complex, multi-step workflows. Unlike traditional chatbots, Agent Mode can think through problems, break them into steps, and use specialized tools to accomplish tasks.
How It Works:
1. Analyze – Understands your request and what you need
2. Plan – Creates a step-by-step execution plan with clear milestones
3. Execute – Uses the right tools (Excel skills, web search, Python) to complete each step
4. Deliver – Shows you results and makes sure they meet your needs
Agent Mode is ideal when you need more than a quick answer:
| Task Type | Example |
| Document work | Creating/editing Excel, Word, PDF files |
| Data analysis | Processing spreadsheets, generating insights, creating charts |
| Research | Finding current info, summarizing sources |
| Content creation | Building presentations, reports, diagrams |
| Automation | Multi-step workflows, data transformation |
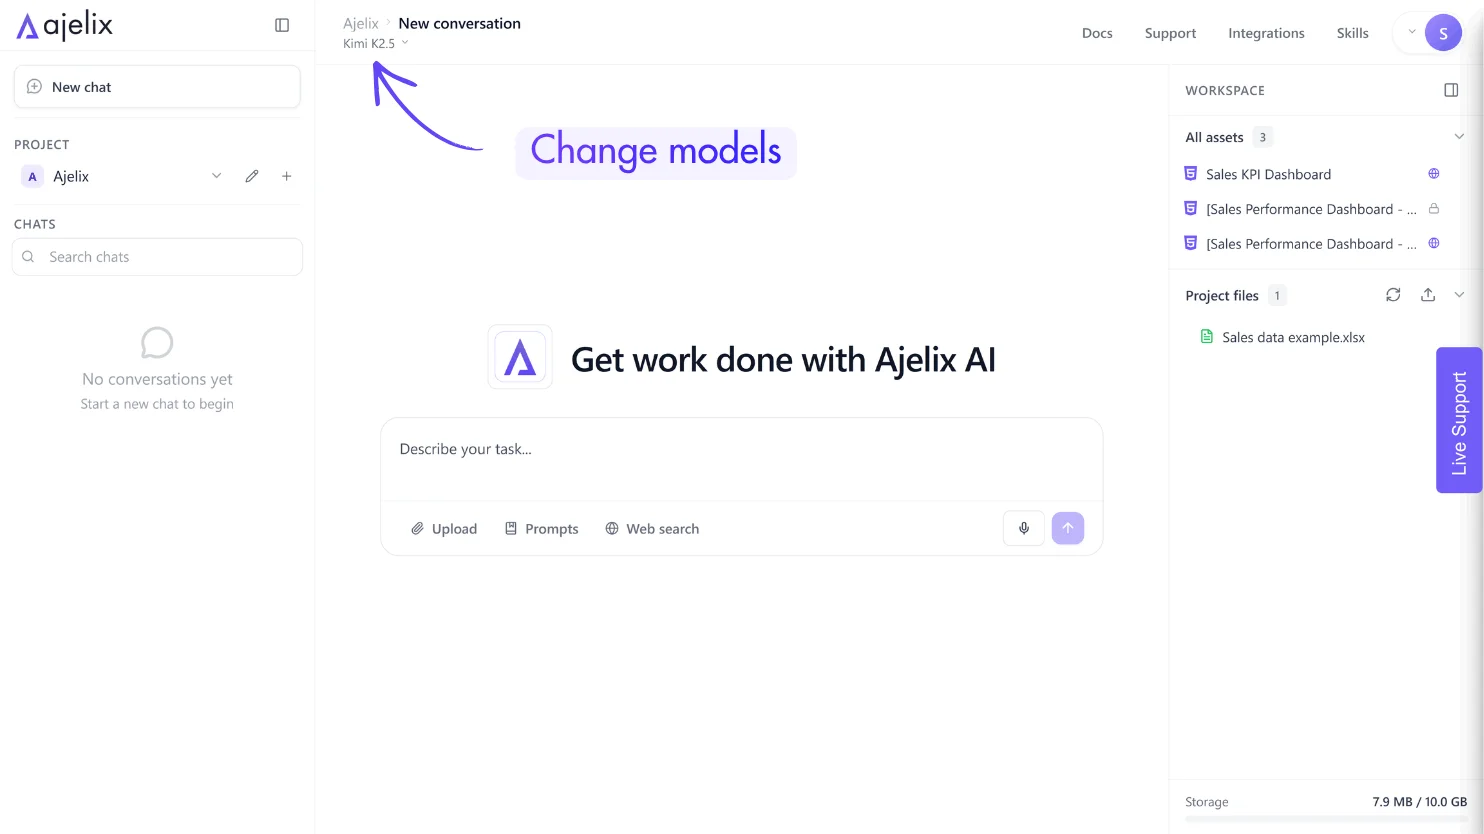
Model Selection
Access different AI models via the model selector, a dropdown in the input field.
Available models depend on your subscription tier:
- Free tier: Access to standard models for everyday tasks
- Lite/Pro tiers: Expanded model options with higher capability models
- Max tier: Access to the most powerful models for complex reasoning and generation tasks
Recommendation: Once you try the most powerful models, it’s hard to use the default models, but they are still useful for light tasks. However, powerful models are perfect for complex coding, detailed analysis, or creative writing tasks.
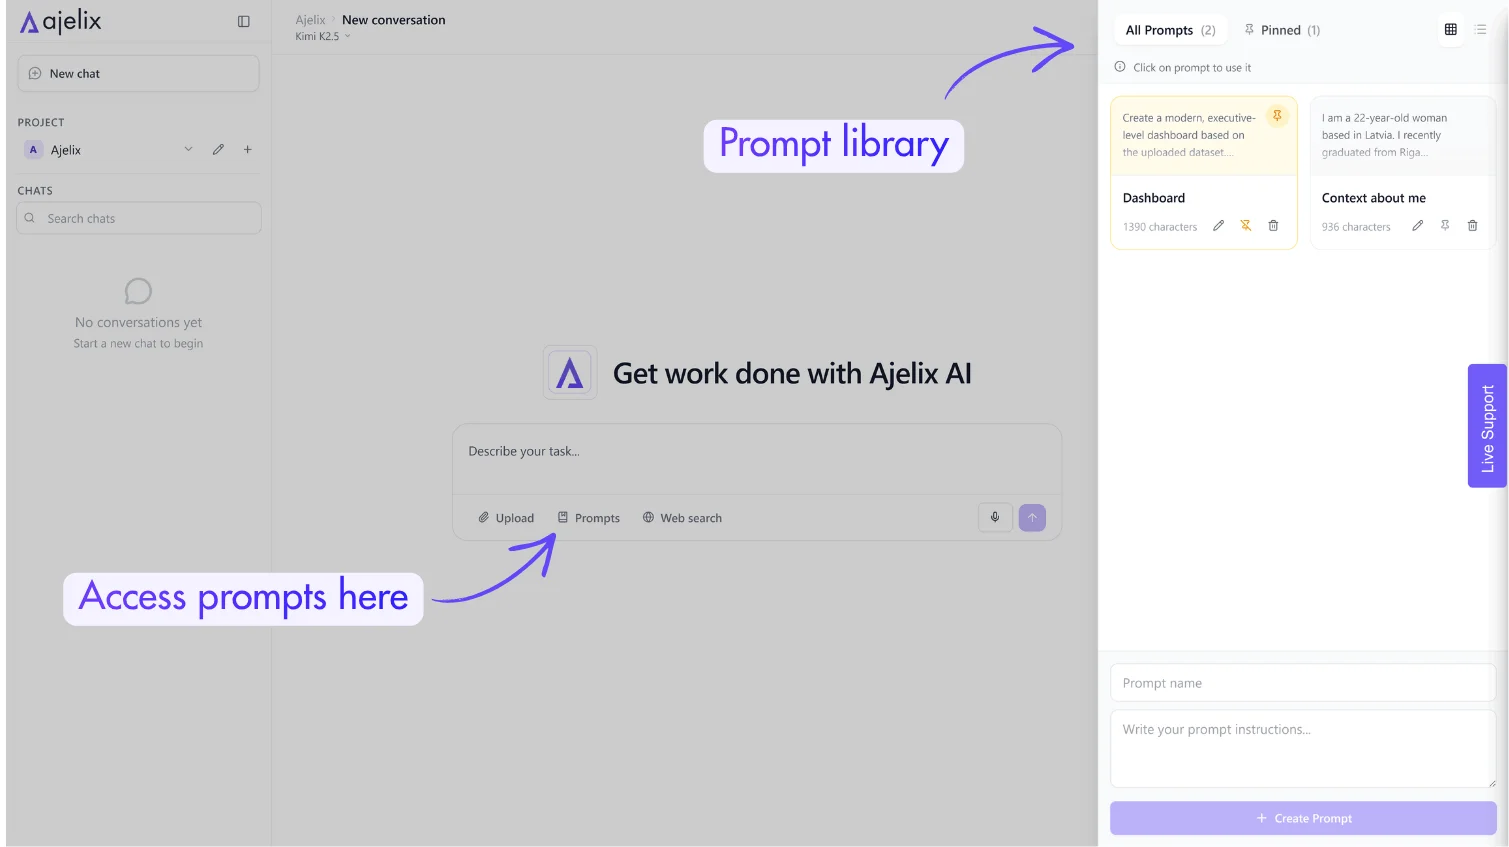
Prompt Library
The prompt library contains your saved prompts for common tasks. Access it via the book/document icon near the input field.
How to use:
- Click the prompt library icon
- Create a new prompt or add from a chat conversation
- Select a prompt whenever it that matches your need
Prompt library is a place where you can save your prompts and use them later. It’s especially useful for workflows that repeat regularly.
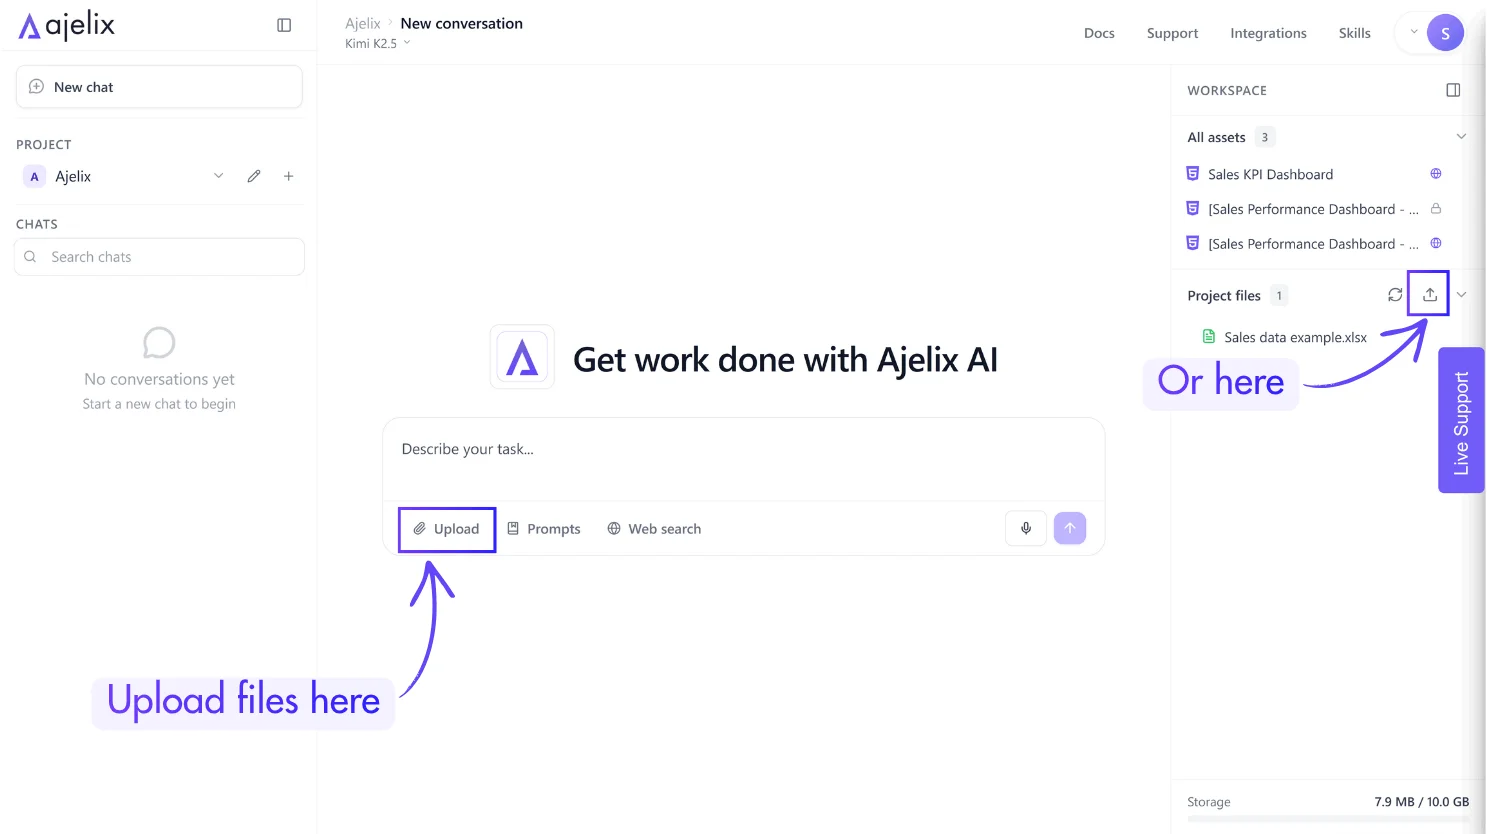
File Upload
Upload files for analysis, processing, or transformation using the attachment icon (paperclip) in the input area or workspace area – (upload) icon next to project files.
Supported file types:
| File Type | Capabilities |
| Excel (.xlsx, .xls, .xlsm) | Read, edit, create formulas, generate charts, data analysis |
| CSV | Data processing, conversion, analysis |
| Word (.docx) | Read, create, edit with tracked changes, comments |
| PowerPoint (.pptx) | Create, edit presentations, add slides |
| Extract text/tables, create new PDFs, merge/split | |
| Images | OCR text extraction, analysis |
Google Sheets: Paste a public Google Sheets URL directly into the chat for analysis, no download needed.
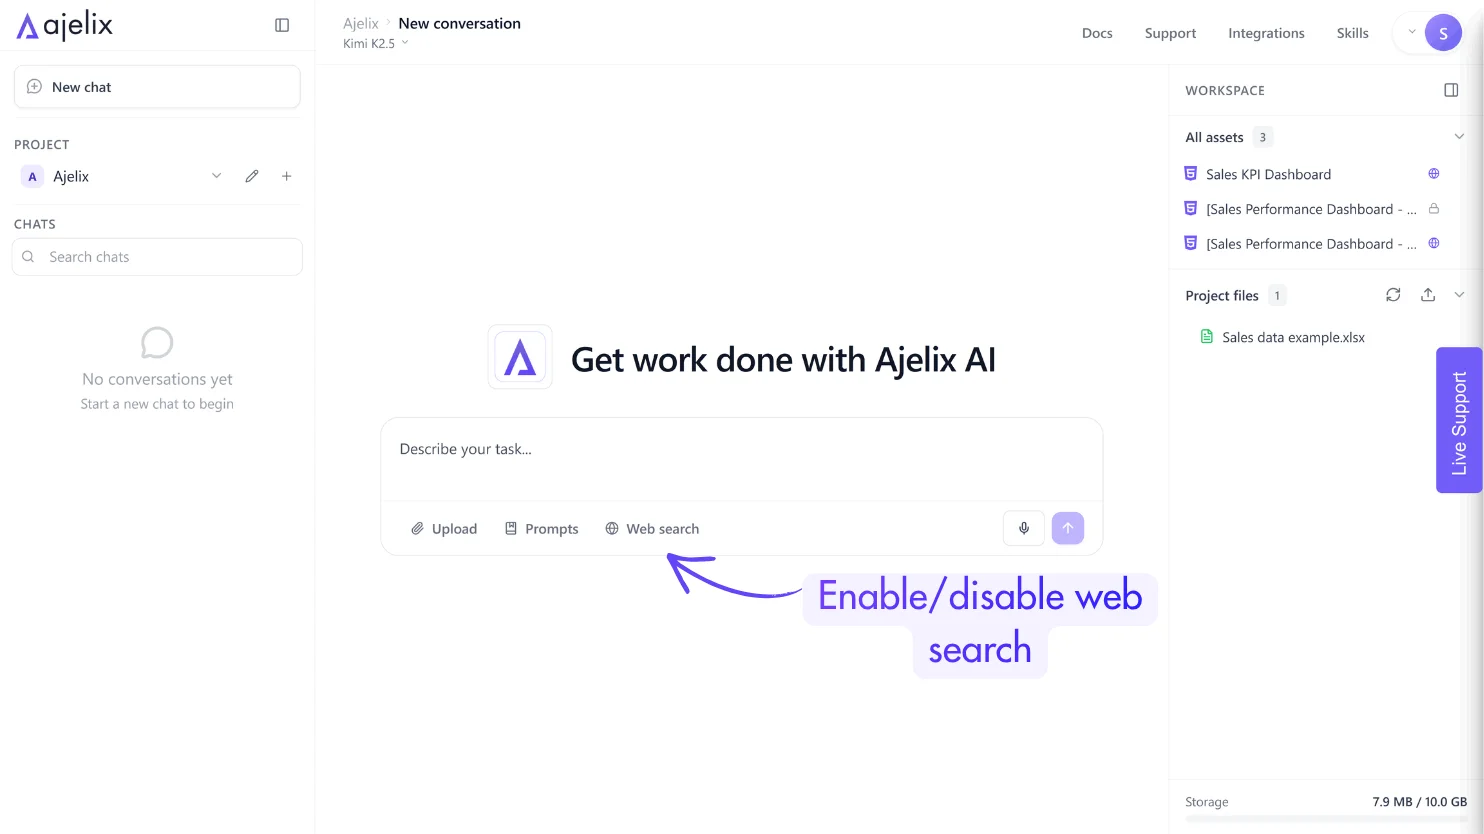
Web Search Toggle
Enable internet access for real-time information by toggling the Web Search switch, located in the toolbar below the input area.
When enabled:
- AI can access current information, news, and documentation
- Useful for researching recent events, checking current APIs, or verifying facts
- May increase response time slightly
Note: Keep web search disabled for faster responses when working with existing documents or general knowledge tasks.
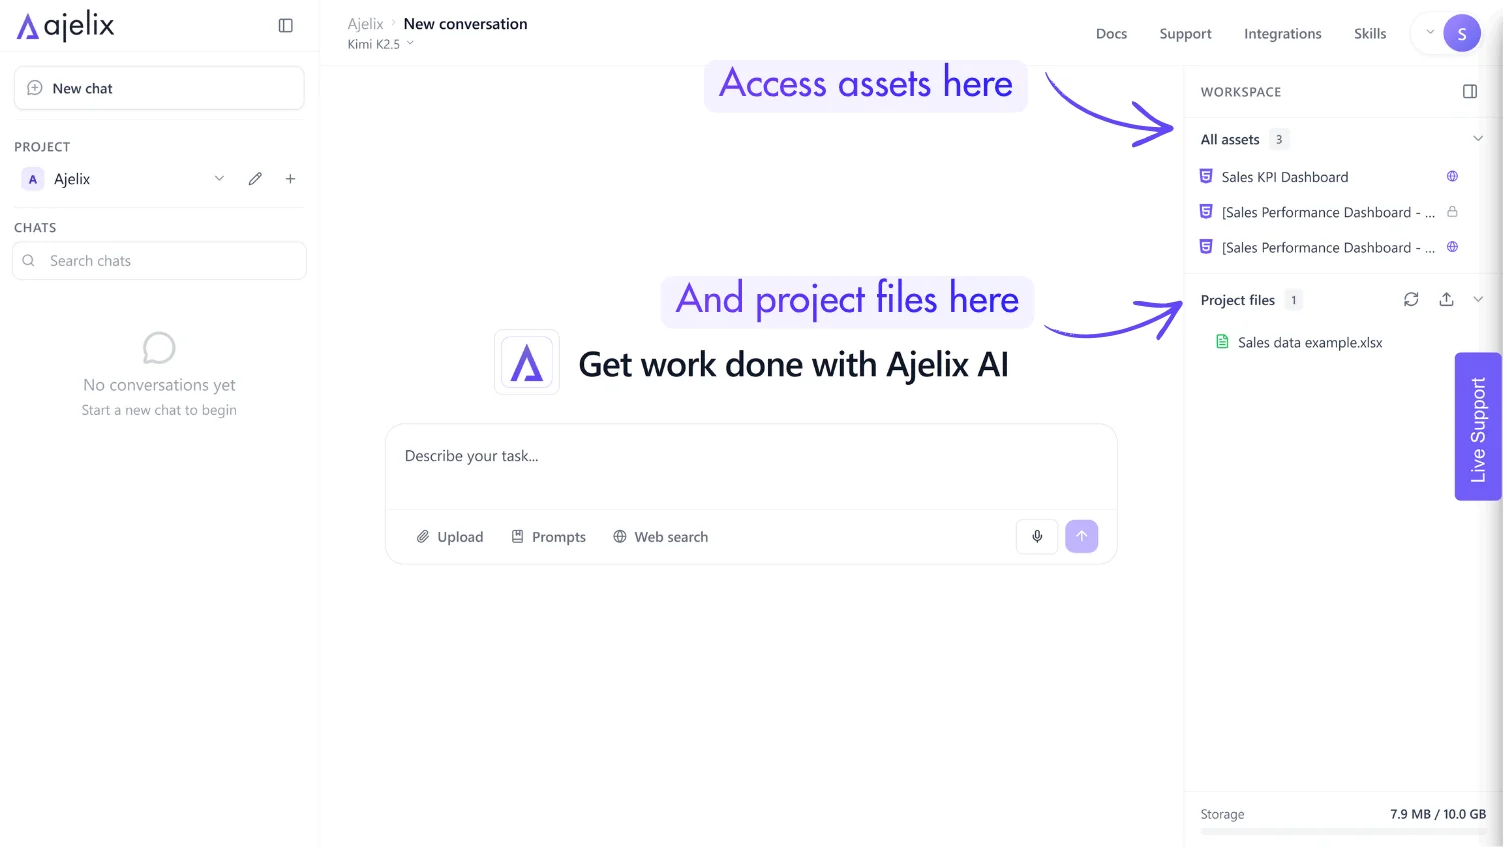
Assets
Assets are self-contained visual outputs generated by Ajelix that render directly in the chat. You can access them anytime in the interface:
Assets include:
| Asset Type | Description |
| Dashboards | Interactive data visualizations with charts, tables, and filters |
| Webpages | Landing pages, portfolios, marketing sites with HTML/CSS/JS |
| Apps & Tools | Functional utilities like calculators, converters, planners |
| Diagrams | Flowcharts, mind maps, architecture diagrams (Mermaid) |
| Widgets | Interactive HTML components that embed in the chat |
Managing Assets:
- View: Assets render inline in the conversation
- Access: Find all assets in the workspace sidebar
- Publish: Click “Publish” on any asset to generate a shareable link
- Download: Save assets as files (HTML, etc.)
- Edit: Click “Modify with AI” to request changes, or edit the source code directly
Project files include:
| Asset Type | Description |
| Spreadsheets | Financial models, trackers, and dashboards with formulas and data analysis |
| Documents | Reports, proposals, contracts, and formatted text content |
| Presentations | Slide decks, pitch materials, and visual storytelling content |
| PDFs | Export-ready documents, forms, and finalized deliverables |
| Data Files | CSV exports, raw datasets, and structured data for import/export |
| Code Files | Scripts, configuration files, and technical implementation assets |
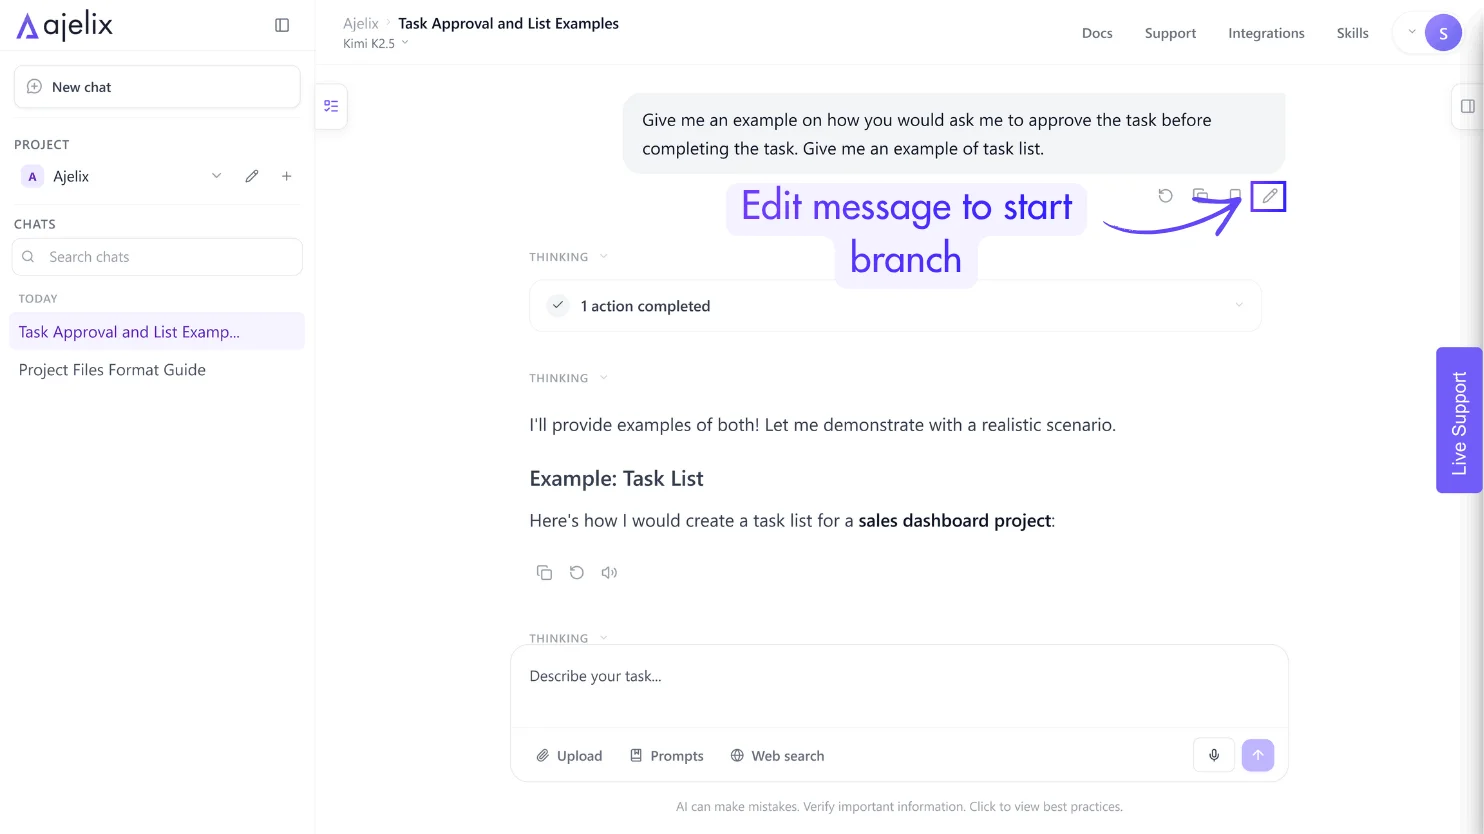
Creating Branches
Branches let you explore different directions from any point in a conversation without losing the original thread.
To create a branch:
- Hover over any message you sent
- Click the edit button under the chat message
- Edit your original message
- Submit to start a new conversation path from that point
Branching use cases:
- Try different approaches to the same problem
- Compare outputs from different models
- Explore variations without losing your original progress
- Collaborate by creating parallel discussion threads
Switch between branches using the branch selector in the conversation header. The original conversation remains intact.
Quick Reference: Interface Elements
| Element | Location / Access |
| Model Selector | Top toolbar dropdown |
| Prompt Library | Book/document icon near input field |
| File Upload | Paperclip icon in input area or upload icon in workspace area |
| Web Search | Toggle switch in under input field |
| Assets Gallery | Sidebar workspace tab |
| Pin Chat | Hover chat in sidebar → star icon |
| Create Branch | Edit icon under your message |
