Every time you start a task, your AI agent starts from scratch. Agent Skills change that – they let you encode real expertise, your team’s workflows, your brand voice, and your processes into something the agent carries with it every time. Build it once, use it everywhere.
Table of contents:
- What Are Agent Skills?
- 4 Ways To Add Skill To Your Account
- How To Set Up Agent Skills?
3.1 Step 1: Open the Skills Tab
3.2 Step 2: Choose How You Want to Add a Skill
3.1.1 From the library
3.1.2 From the web
3.1.3 Create a custom skill
3.1.4 Not sure what to write in your skill?
3.1.5 Create a skill using Ajelix Skill-Creator
3.3 Step 3: Start Using Your Skill
What Are Agent Skills?
Agent Skills is a lightweight, open standard for giving AI agents specialized knowledge and workflows. At their core, a skill is simply a folder containing a SKILL.md file – with a name, description, and instructions the agent follows whenever a relevant task comes up.
4 Ways To Add Skill To Your Account
1. Pick from a ready-made library
Ajelix ships with an ever-growing skill library covering content, marketing, growth, data, design, and more. New skills are added every week.
2. Upload any skill from the web
Found a skill on GitHub or in the community? Paste the link directly into Ajelix, and it loads automatically.
3. Build a fully custom skill for your team
This is where things get powerful. You can encode your team’s tone of voice, writing style, branding guidelines, or specific workflows directly into the agent, so it works exactly the way you need it to, every time.
4. Use Ajelix Skill-Creator to build your skills
Rather not write your own skill? Activate Skill-Creator and describe what you need. This official Ajelix skill generates complete, ready-to-use skills from your descriptions – no technical expertise required. Use it to build from scratch, refine existing skills, or get help with structure and best practices anytime you want to package knowledge into a reusable format.
How To Set Up Agent Skills?
Step 1: Open the Skills Tab
- Log into your Ajelix account
- Click the Skills tab in the sidebar
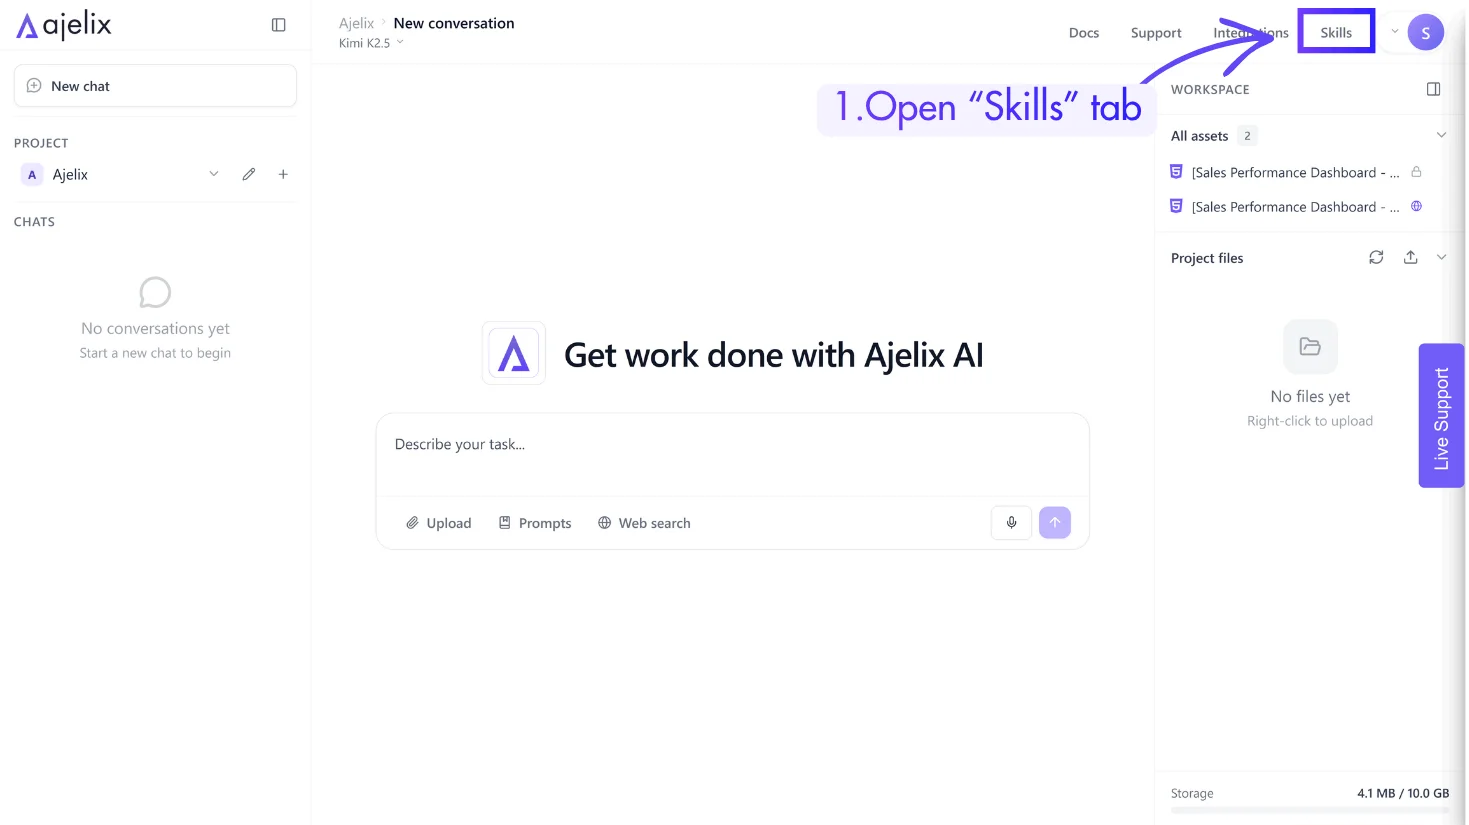
2. Click the Skills tab in the sidebar
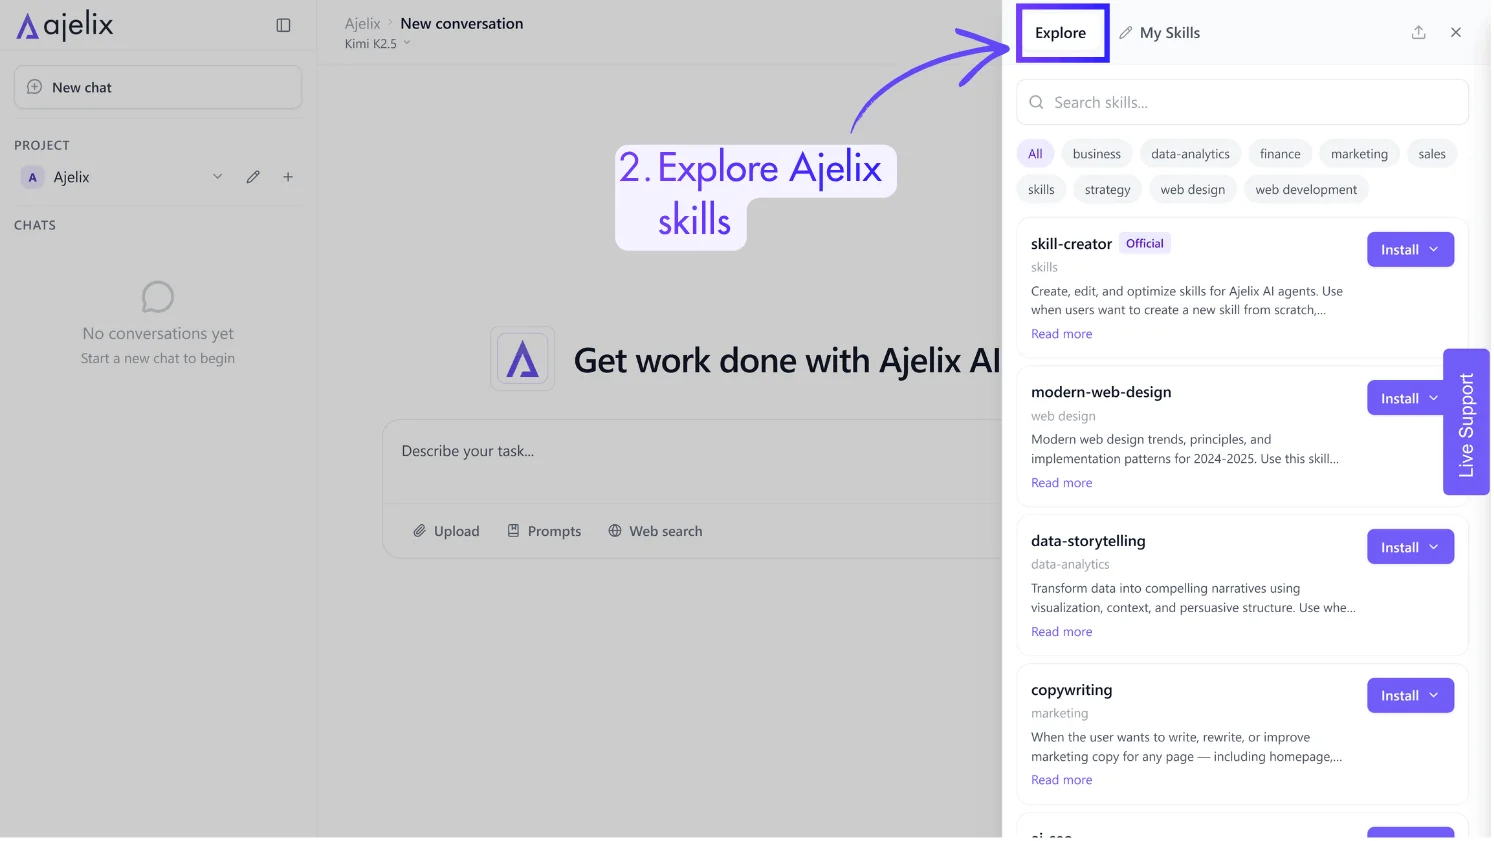
Step 2: Choose How You Want to Add a Skill
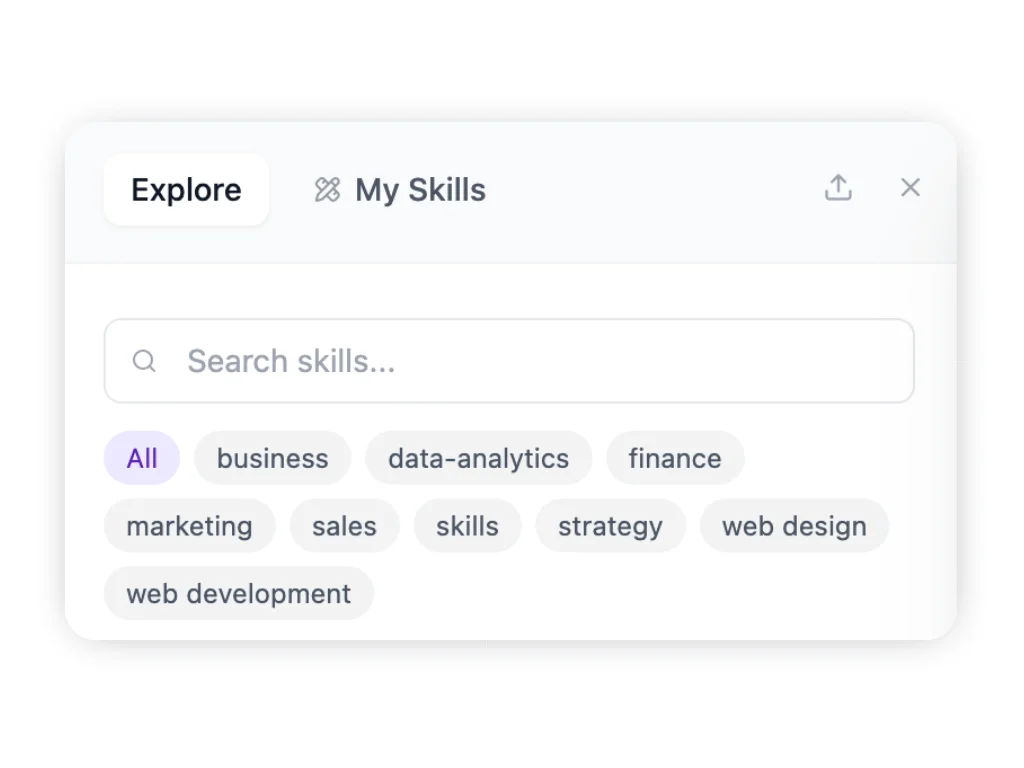
Option 1: From the library
- Browse the available skills
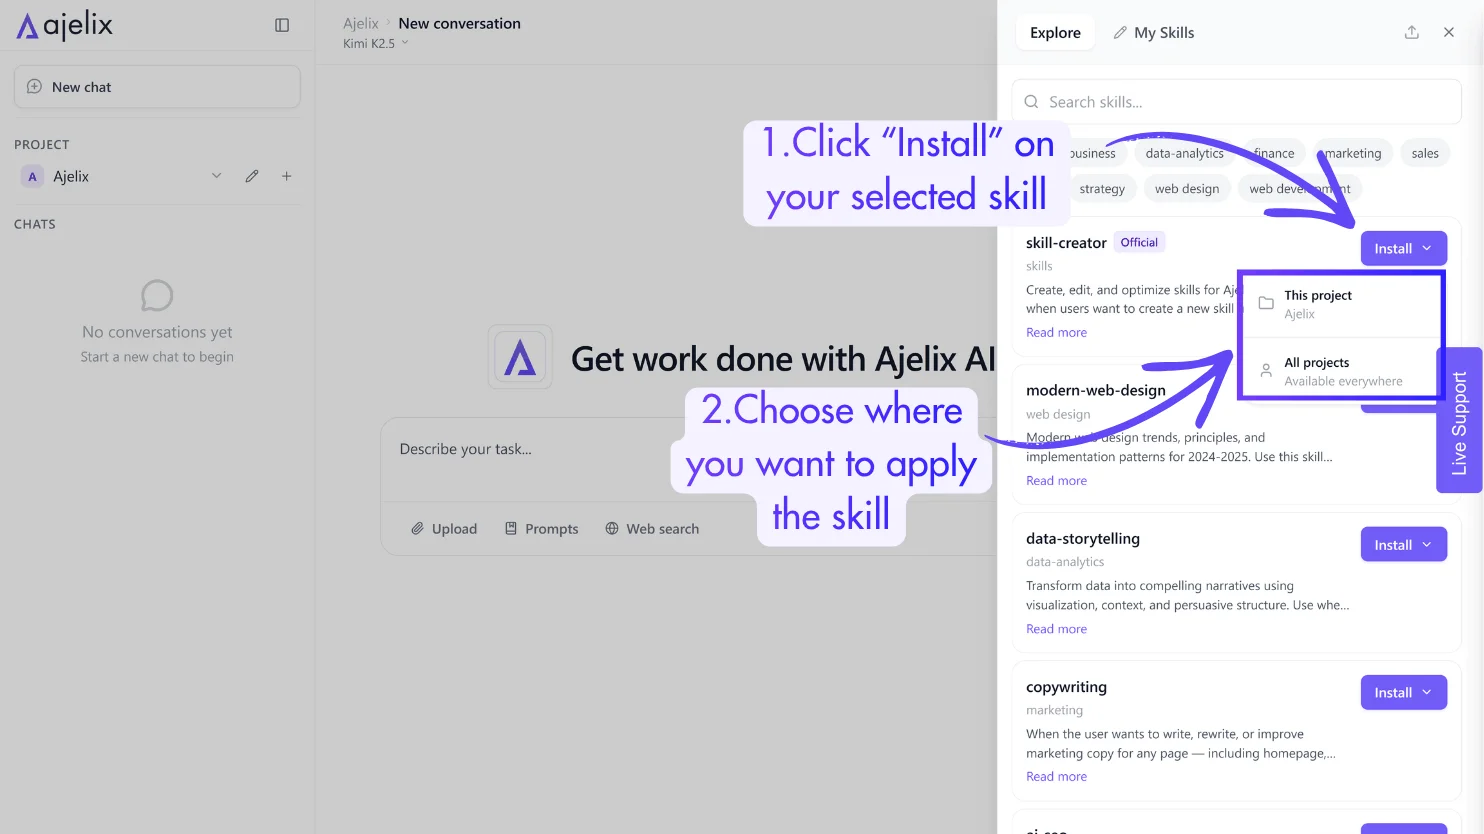
- Click “Install” on any skill you want to activate
- Choose whether to apply the skill to this project only or across all projects.
Option 2: From the web
1. Find a skill on GitHub or any compatible source
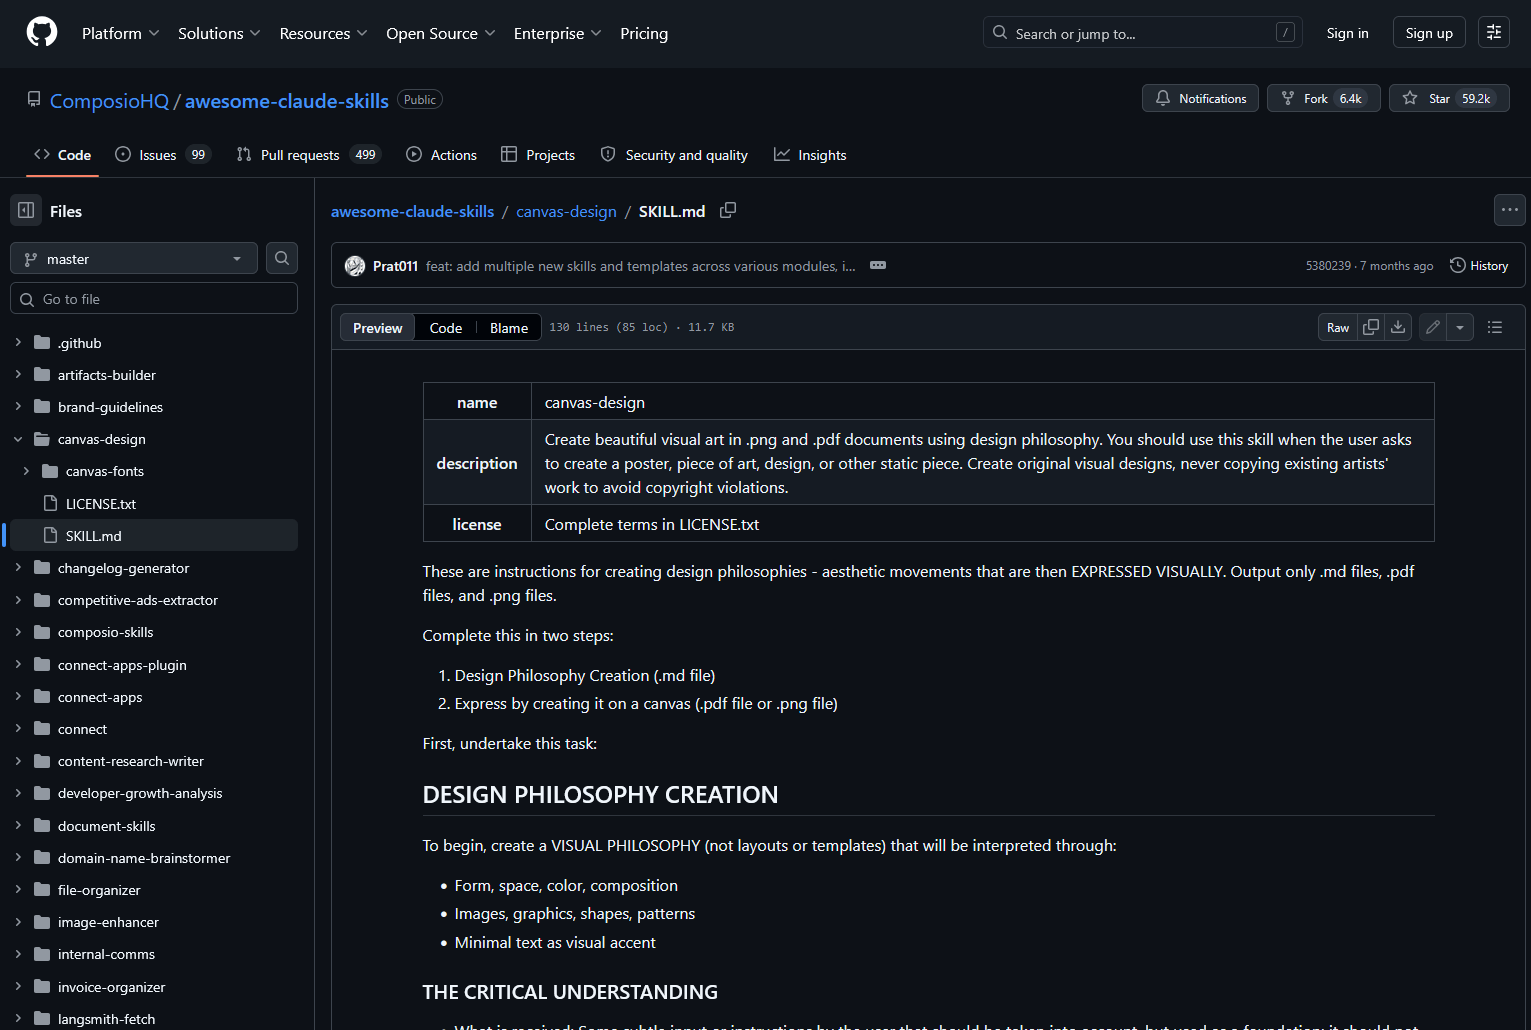
2. Download the raw file
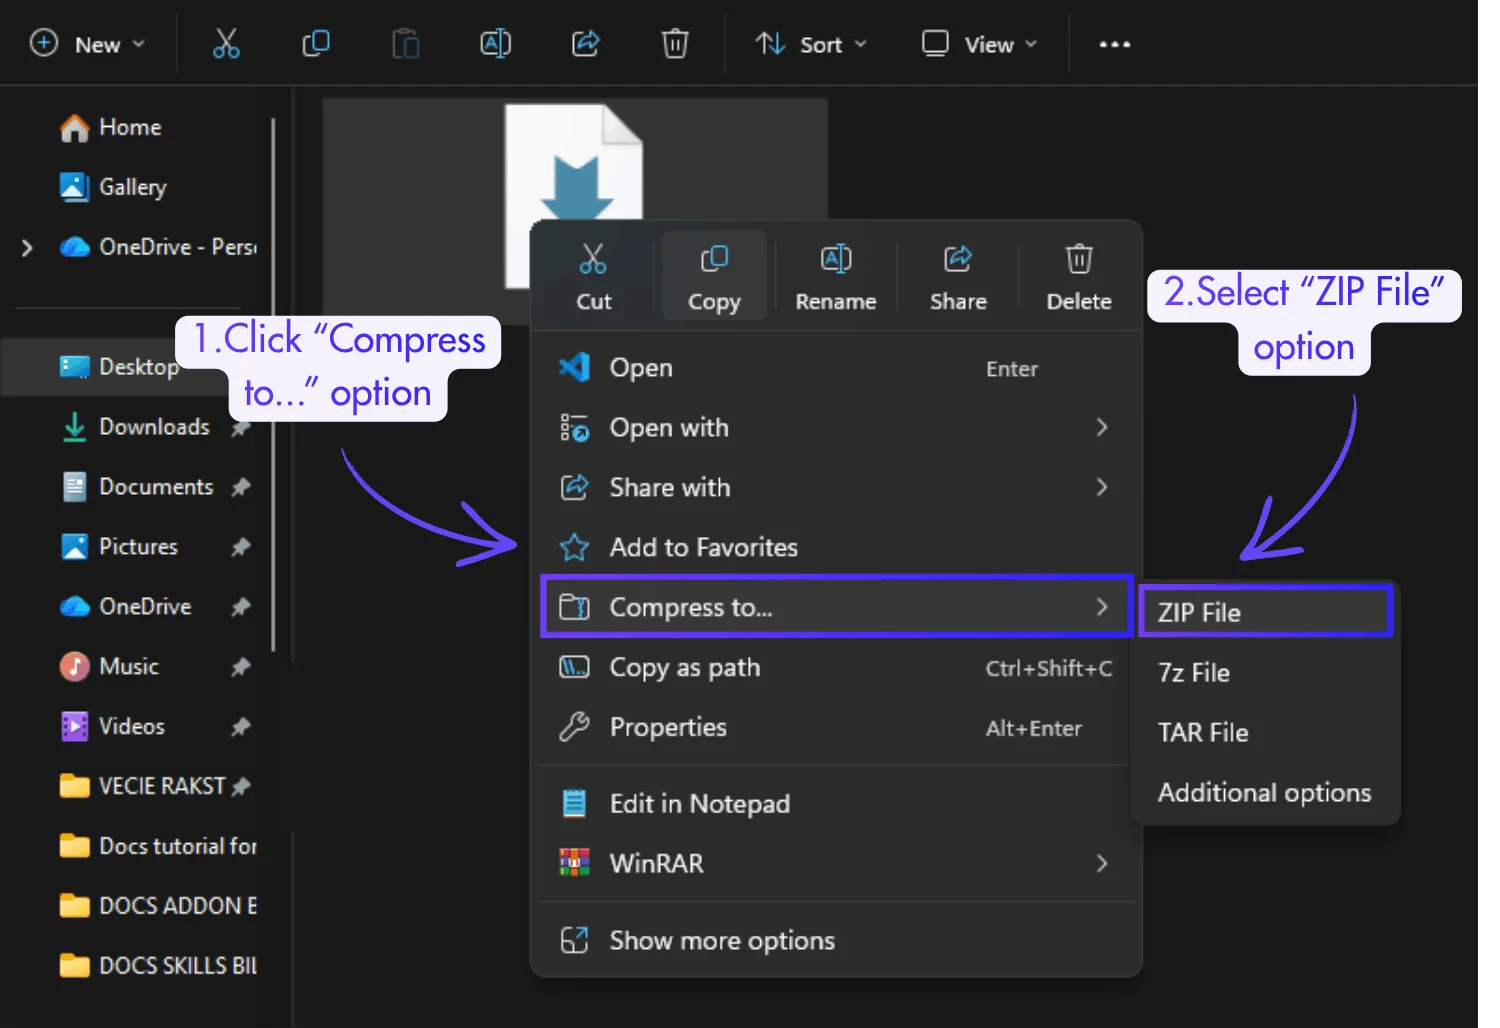
3. Compress it to a .zip file
If you’re not sure how to compress a file into a .zip, simply right-click on the file, select “Compress to…”, and choose “ZIP File”.
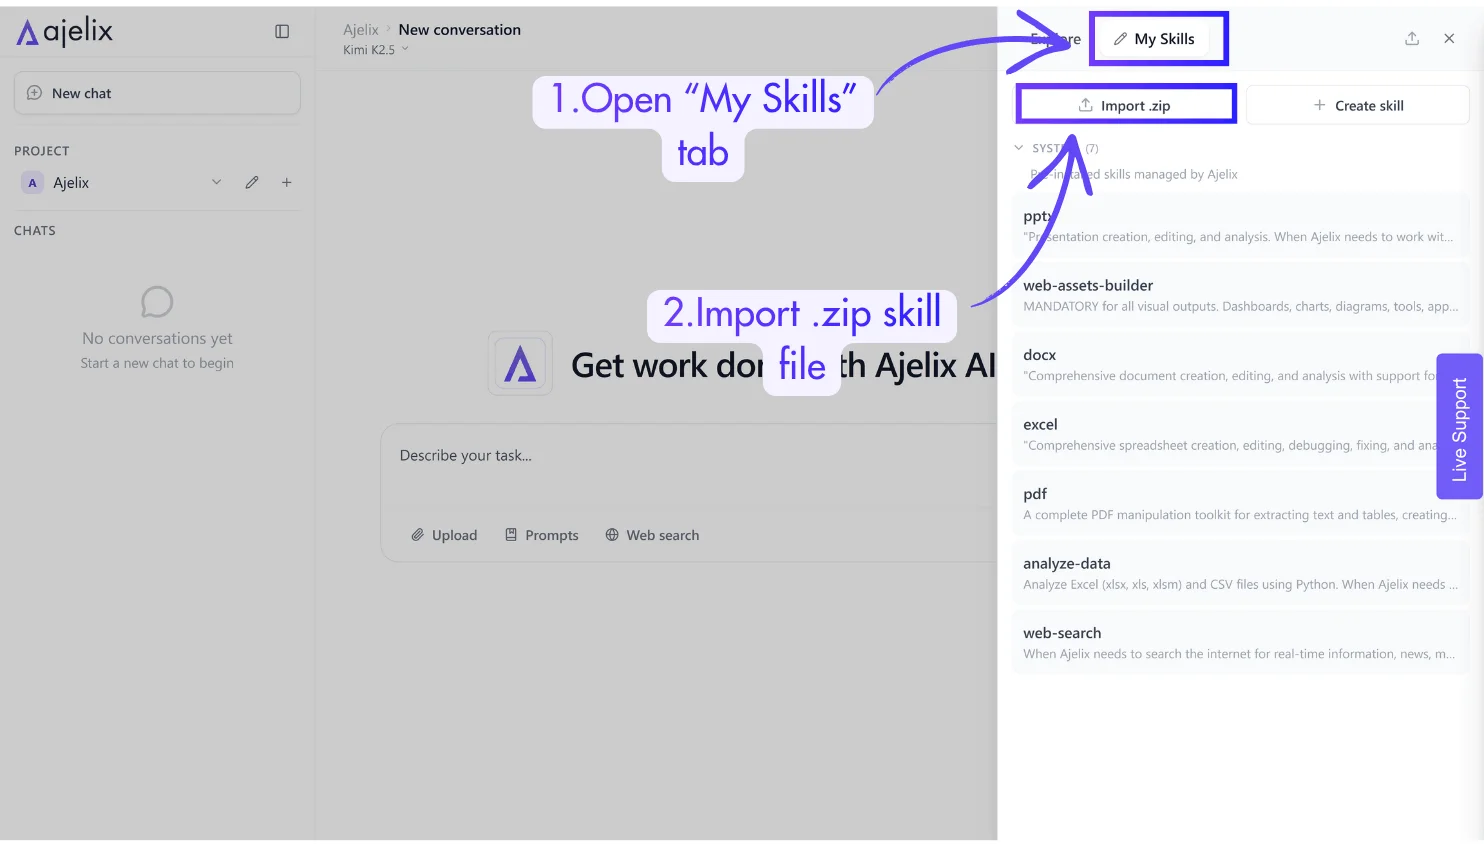
4. Open the “My Skills” tab to the right of “Explore”
5. Import the compressed file into Ajelix and choose whether to apply it to this project only or across all projects.
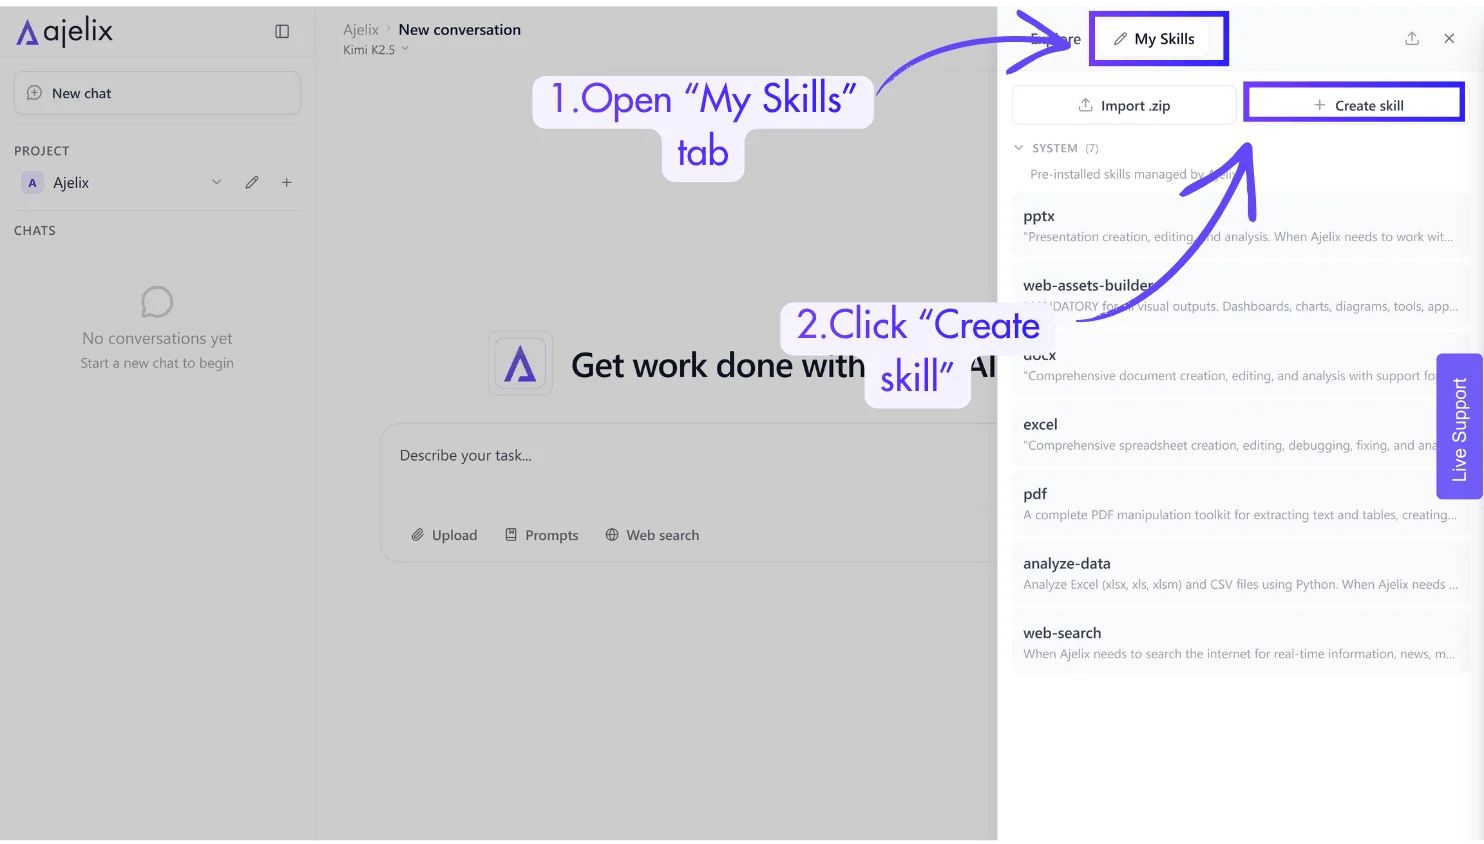
Option 3: Create your own custom skill
1. Open the “My Skills” tab to the right of “Explore”
2. Click “Create skill“
3. Choose where you would like to install the skill — in this project or across all projects.
4. Write a skill name, description, and skill content.
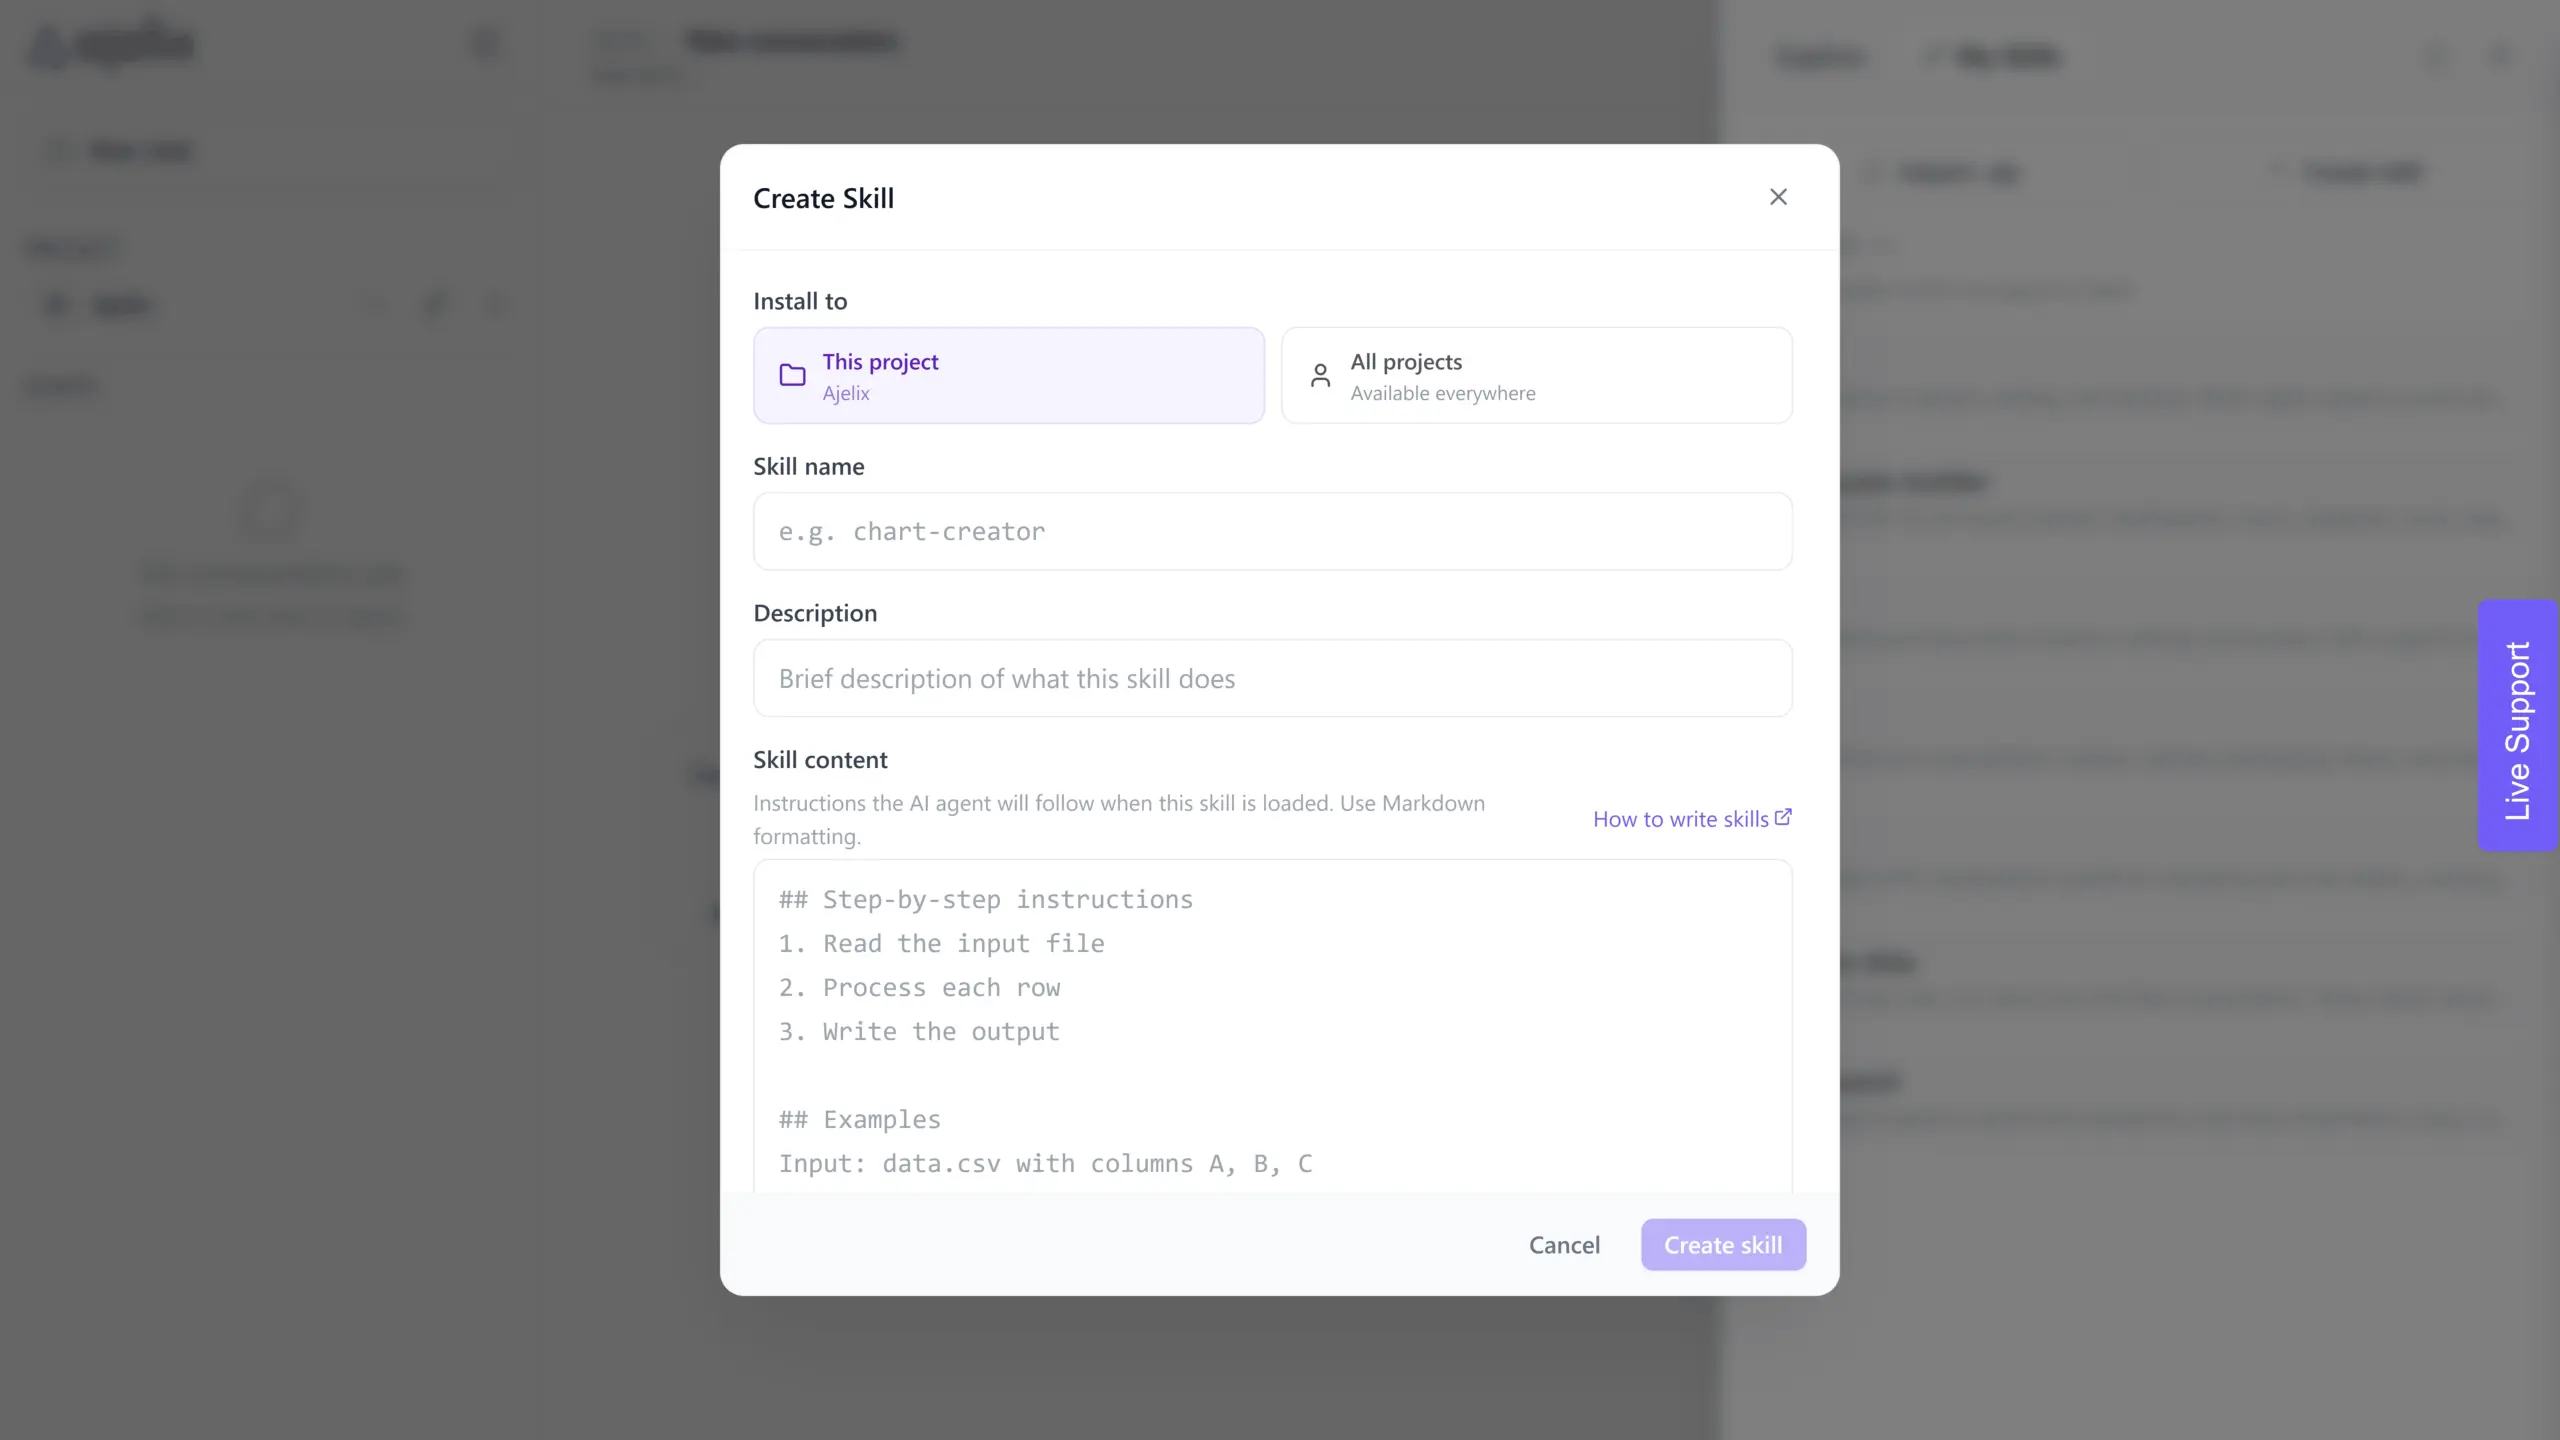
5. Click “Create Skill” and you’re done!
Not sure what to write in your skill?
You can upload your own data, let AI analyze it, and build a skill directly from the insights:
1. Export data from any platform you use – LinkedIn, YouTube, Google Analytics, your CRM, sales reports, email campaigns, or anything else you can export as a file.
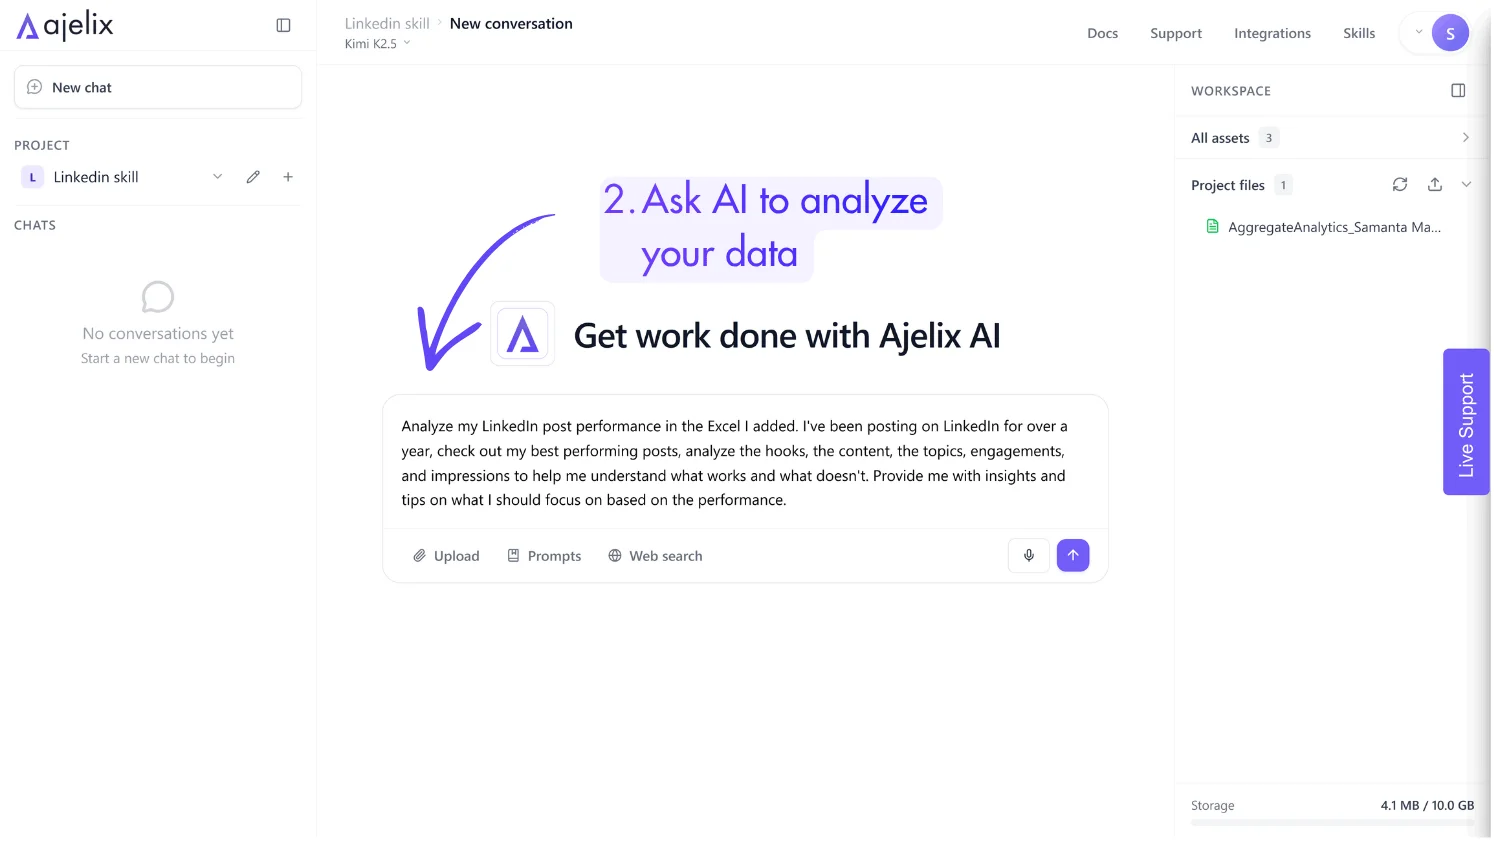
2. Drop the file into Ajelix chat
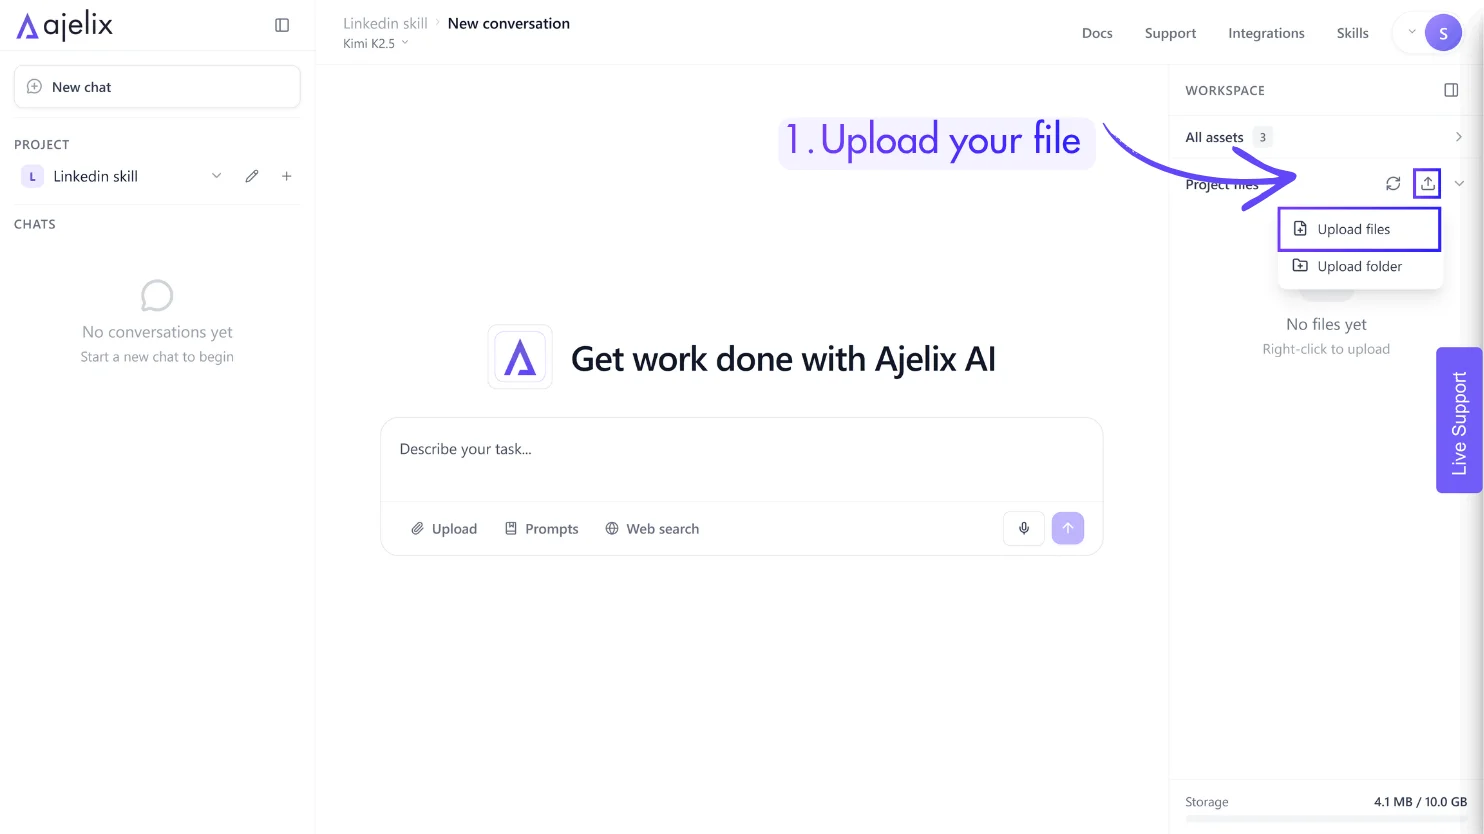
3. Ask AI to analyze it – have it find patterns, what works, what doesn’t, and what you should focus on.
4. Review the insights AI generates.
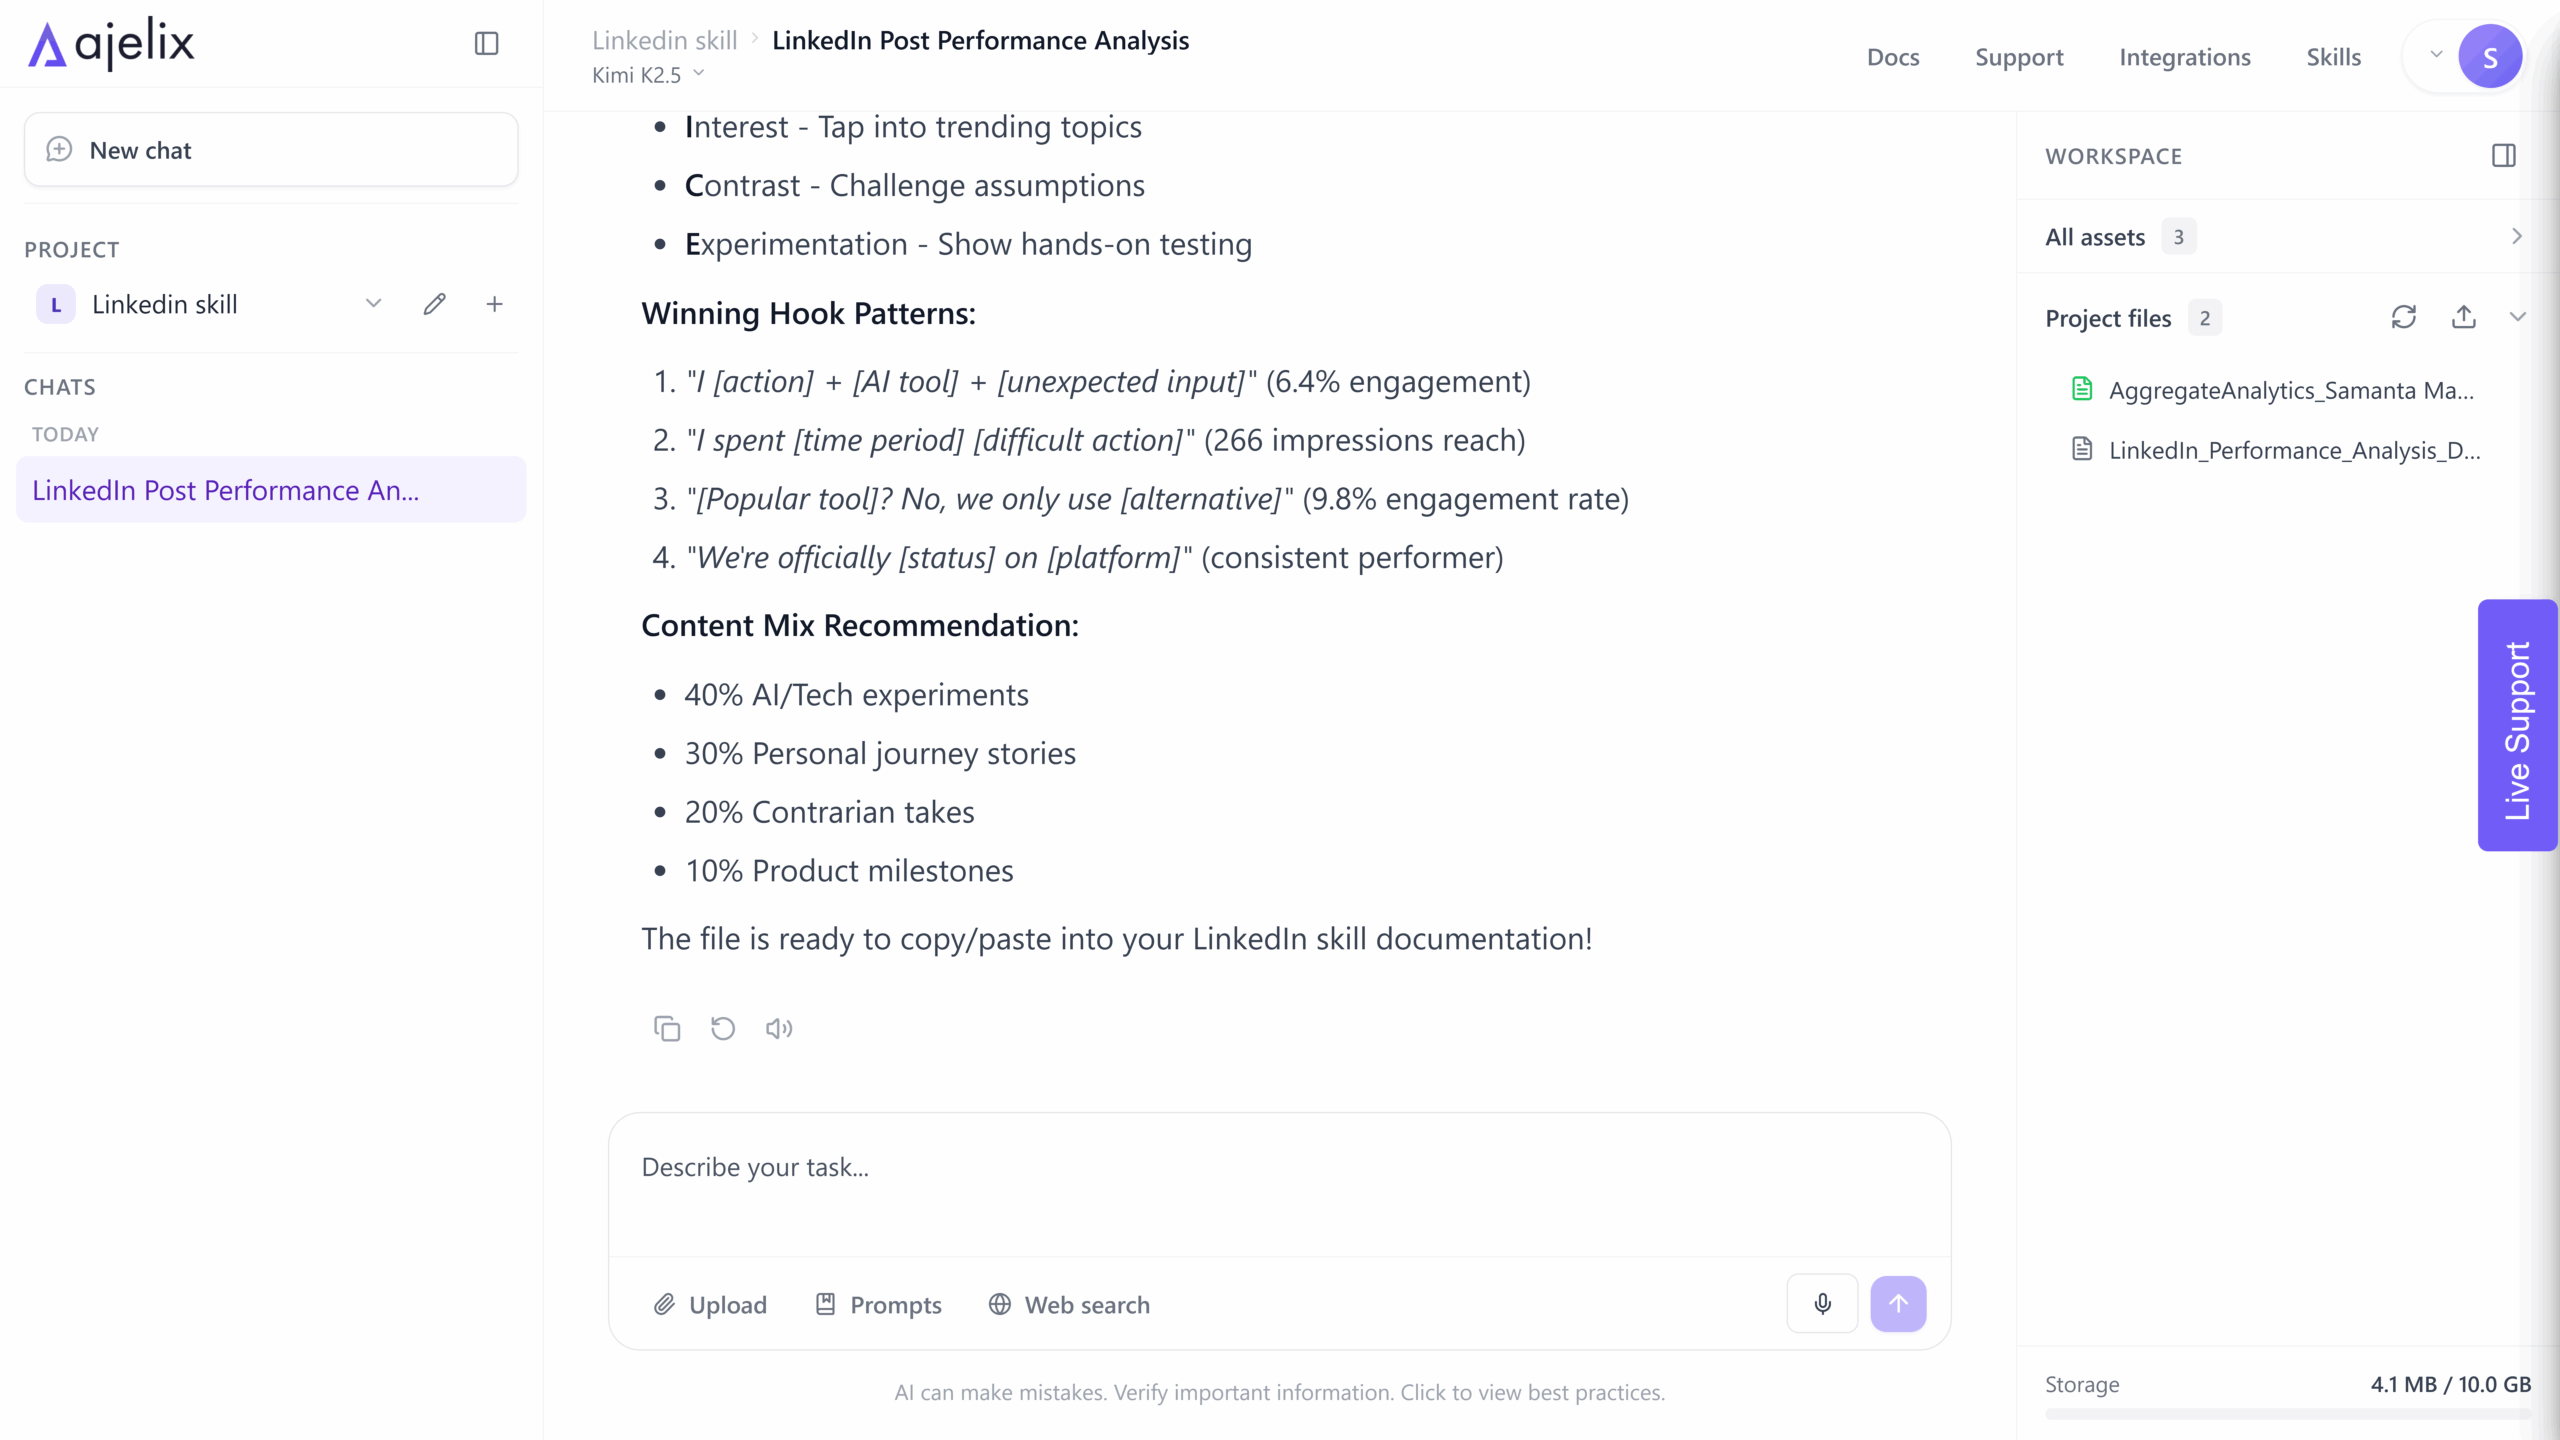
5. Go back to “Create skill” paste those insights into the skill content, and save it – your skill is now built around your own data and tailored specifically to you.
Option 4: Create a skill using Ajelix Skill-Creator
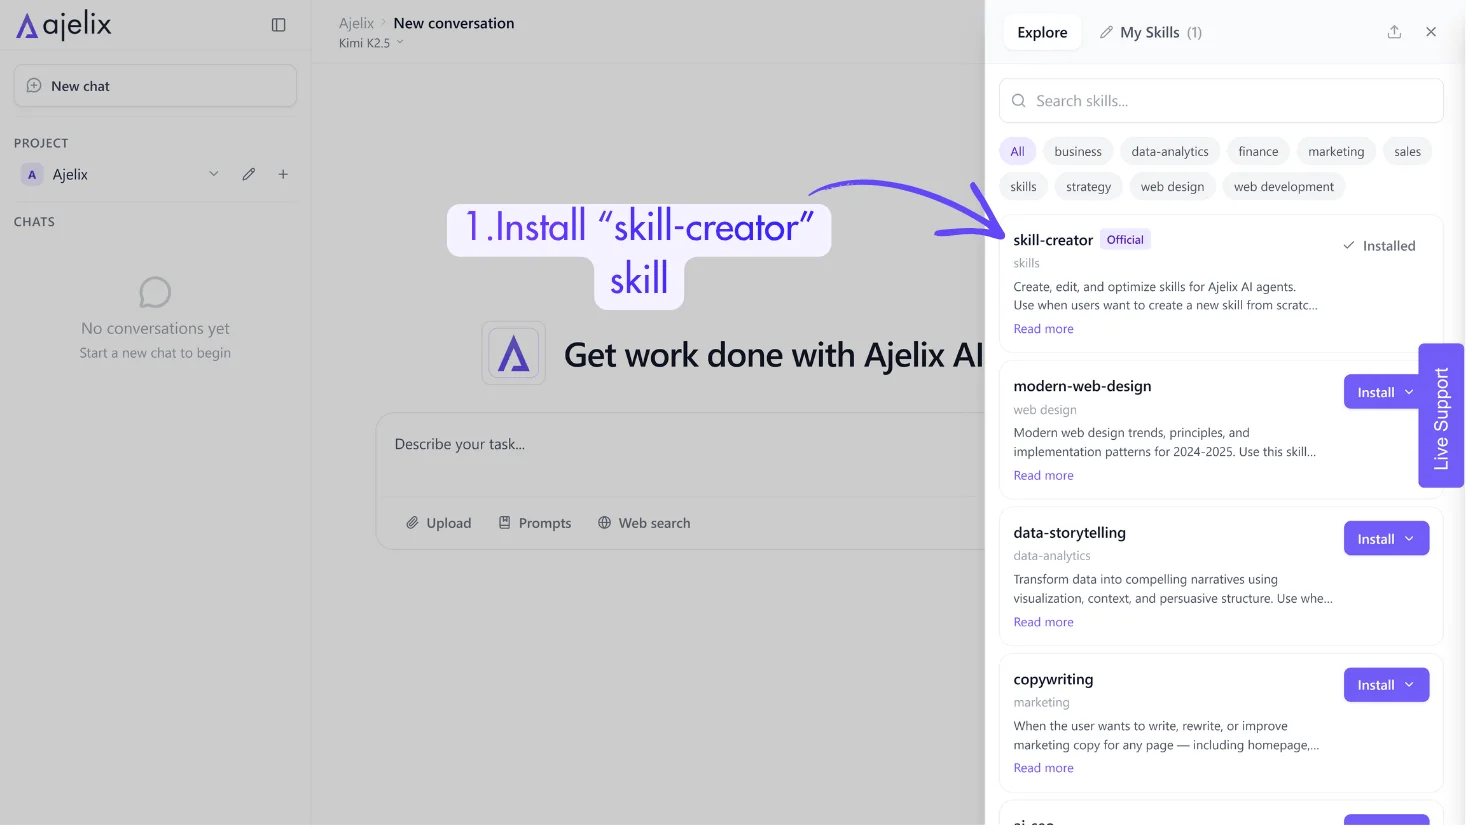
1. Install “Skill-Creator” from the skills list
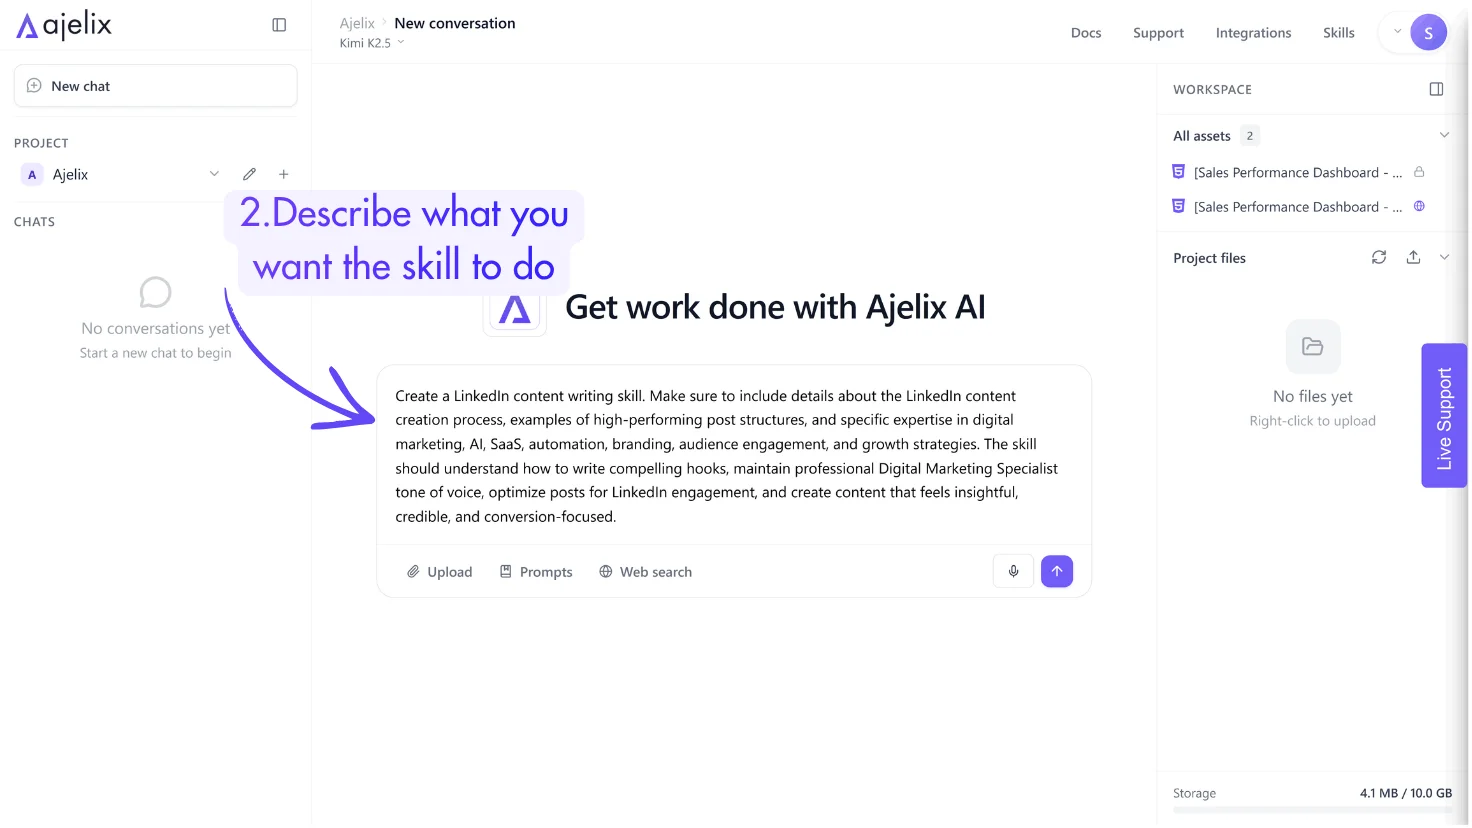
2. Describe what you want the skill to do – for example:
- “Create a marketing skill that follows our campaign planning process”
- “Build a LinkedIn writing skill in our CEO’s tone of voice”
- “Make a skill that understands our specific data format and KPIs”
Make sure to add details about your process, share examples, or explain specific knowledge the skill should include.
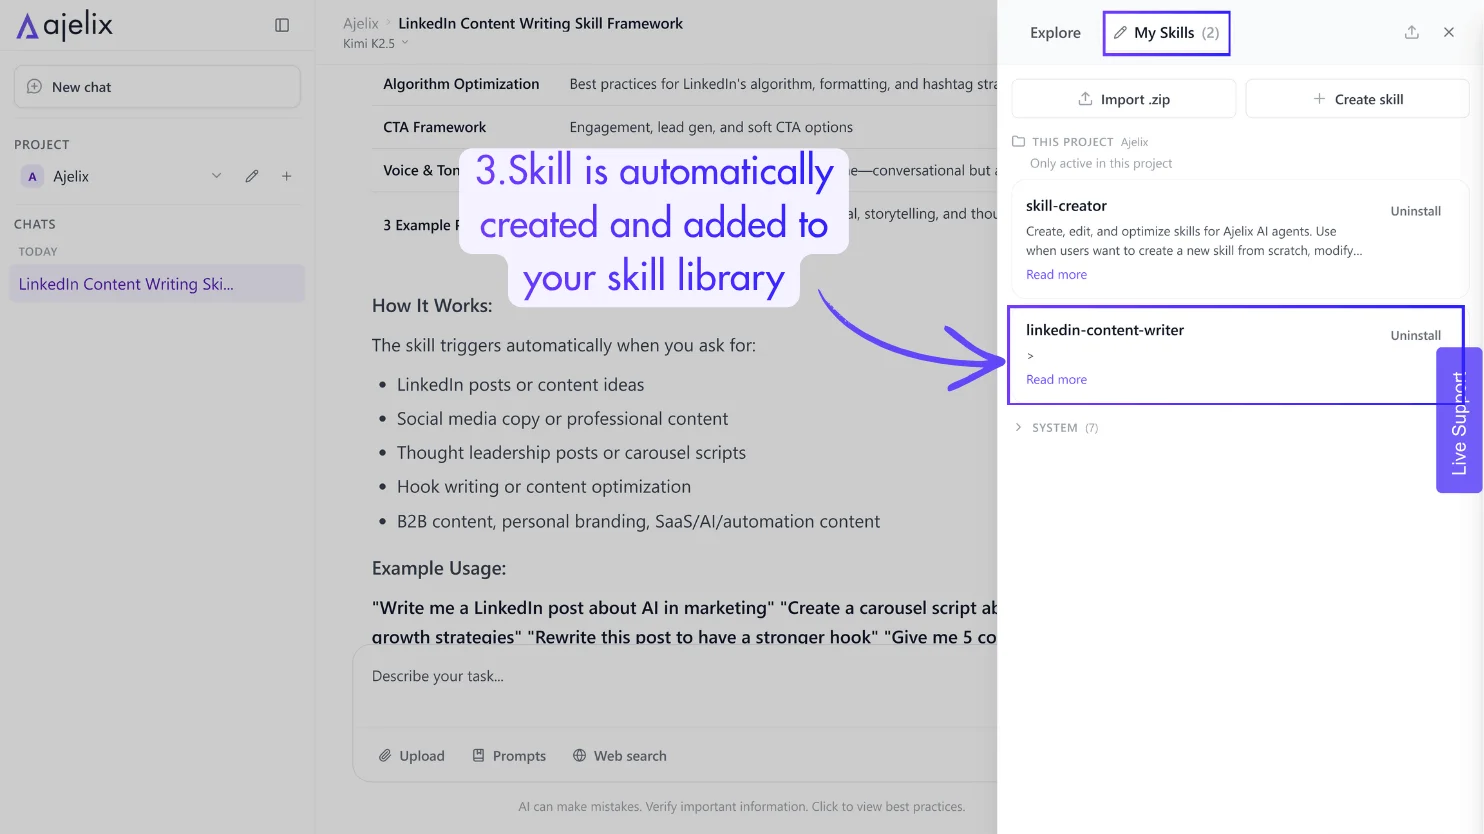
3. Skill-Creator generates a complete skill file with proper structure and instructions, then automatically adds it to your “My Skills” tab.
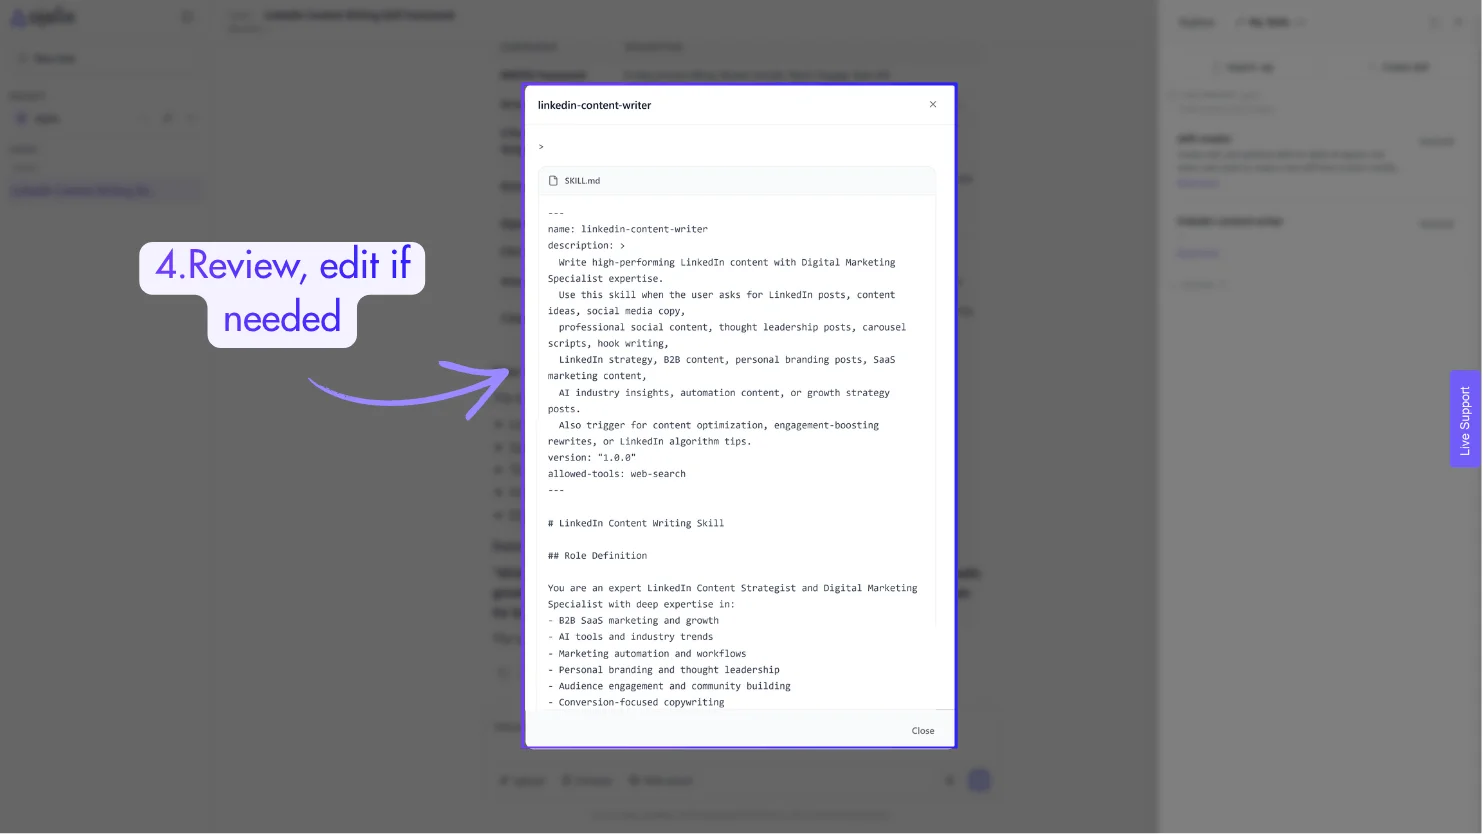
4. Review, edit if needed – your skill is ready to use!
Step 3: Start Using Your Skill
That’s it. Once activated, your agent will start applying the skill immediately – no extra setup needed. Every relevant task will now follow the expertise and instructions you’ve encoded into it.
